
Delicious Cheesy Garlic Bread Recipe Ready in 25 Minutes

Cheesy Garlic Bread is the ultimate comfort food that makes your taste buds dance with joy and your heart skip a beat. Imagine biting into a warm, crusty baguette, spread with a heavenly concoction of buttery, garlicky goodness, and topped with gooey, melted cheese. It’s the kind of dish that transports you to a cozy Italian bistro, making you wonder why you ever settled for plain old toast. Ah, the memories! I remember making Cheesy Garlic Bread for my friends during our Friday night movie marathons. With a simple recipe that transforms everyday ingredients into something spectacular, I felt like a culinary wizard! Whether you’re gathering around the dinner table or snacking while watching your favorite rom-com, this delightful bread is your new go-to. Ingredients for Cheesy Garlic Bread Here’s what you’ll need to make this delicious Cheesy Garlic Bread: 1 French baguette (12 inches) – A crusty baguette holds up beautifully to the toppings and delivers that irresistible crunch. 1/2 cup unsalted butter (softened) – This rich base within the dish brings creaminess and flavor to each bite. 4 cloves fresh garlic (minced) – Fresh garlic is crucial to infuse your bread with strong, delectable flavors that instantly awaken your taste buds. 1 cup shredded mozzarella cheese – Mozzarella melts to create that ooey-gooey texture we all crave. 1/4 cup grated Parmesan cheese – This cheese adds a wonderful nuttiness and depth of flavor to the topping. 2 tablespoons chopped fresh parsley (for garnish) – The final sprinkle of parsley not only makes the dish visually stunning but also adds a fresh pop of flavor. How to Make Cheesy Garlic Bread Follow these simple steps to prepare this delicious Cheesy Garlic Bread: Step 1: Preheat the Oven Start by preheating your oven to 375°F (190°C). This is crucial because a hot oven will give you that perfectly golden, crispy exterior. Step 2: Slice the Baguette Carefully slice the baguette in half lengthwise. Be sure to use a serrated knife to avoid squishing the bread. You want those halves to remain nice and fluffy! Step 3: Make the Garlic Butter In a medium-sized bowl, combine the softened butter and minced garlic. Mix them well until they are fully incorporated. The kitchen will start to smell heavenly and you might want to taste the delicious mixture (but save some for the bread!). Step 4: Spread the Mixture Generously spread the garlic butter over both halves of the baguette. Don’t be stingy! You want each bite to burst with flavor. Step 5: Add the Cheesy Toppings Now comes the fun part! Sprinkle the shredded mozzarella cheese and grated Parmesan cheese over the buttered baguette halves. Make sure every nook and cranny is covered; there’s no such thing as too much cheese here. Step 6: Bake to Perfection Place the cheesy, buttery baguette halves on a baking sheet and pop them into the oven. Bake for about 12-15 minutes until the cheese is melted and bubbly, and the edges are gloriously golden brown. Your kitchen will smell like a cheesy dream! To serve, cut the Cheesy Garlic Bread into slices and watch it disappear in seconds. Pair this delectable treat with pasta dishes, salads, or simply enjoy it on its own as a tasty snack. Each bite is a blend of crispy texture, rich buttery flavor, and the wonderful taste of garlic and cheese that makes life a little brighter. Enjoy whipping up this delightful dish for your next gathering, movie night, or whenever the craving hits. Happy cooking! Perfecting Cheesy Garlic Bread Cooking Process To achieve magical cheesy garlic bread, start by preheating your oven and preparing the garlic butter mixture. Slice the baguette while allowing the butter to soften further, making it easy to spread. This sequence ensures perfectly melted cheese without burning the bread. Add Your Touch to Cheesy Garlic Bread Feel free to swap the cheeses for your favorites, like cheddar or feta, or throw in some red pepper flakes for a spicy kick. You can also replace the fresh parsley with basil or chives for a unique flair that showcases your culinary creativity. Storing & Reheating Cheesy Garlic Bread Store any leftovers in an airtight container in the refrigerator for up to three days. To reheat, pop them in a 350°F oven for about 10 minutes to restore that glorious crispiness and melty cheese texture. Sharing Cheesy Garlic Bread with friends one evening, their delighted expressions and compliments made my heart swell. It reminded me how good food can create memorable moments and spark joy in everyday life. FAQs About Cheesy Garlic Bread What is Cheesy Garlic Bread? Cheesy Garlic Bread is a delicious, indulgent appetizer that features a crispy baguette generously slathered with a garlic-infused butter and topped with gooey mozzarella and savory Parmesan cheeses. It’s baked until golden and bubbly, creating a textural delight that is both crunchy and soft on the inside. Often garnished with fresh herbs, this dish has become a staple at gatherings and is perfect for sharing with family and friends. With its aromatic garlic flavor and cheesy goodness, it’s no wonder that cheesy garlic bread is loved by many as a comfort food. How Do You Make Cheesy Garlic Bread at Home? To make Cheesy Garlic Bread at home, start with a fresh French baguette. Cut it in half lengthwise and prepare a garlic butter mixture by combining softened butter with minced garlic. Slather this mixture generously onto the cut sides of the baguette, and then cover it with shredded mozzarella and grated Parmesan cheese. Bake it in a preheated oven at 375°F (190°C) for about 12 to 15 minutes until the cheese is melted and bubbly. It’s a straightforward process that results in a mouthwatering treat! Can I Customize My Cheesy Garlic Bread? Absolutely! One of the great things about Cheesy Garlic Bread is its versatility. You can customize the cheese selection by substituting mozzarella with other favorites like cheddar, gouda, or even feta. Adding toppings like red pepper
Delicious CAVA-Inspired Garlic Dressing Recipe in Just 5 Minutes
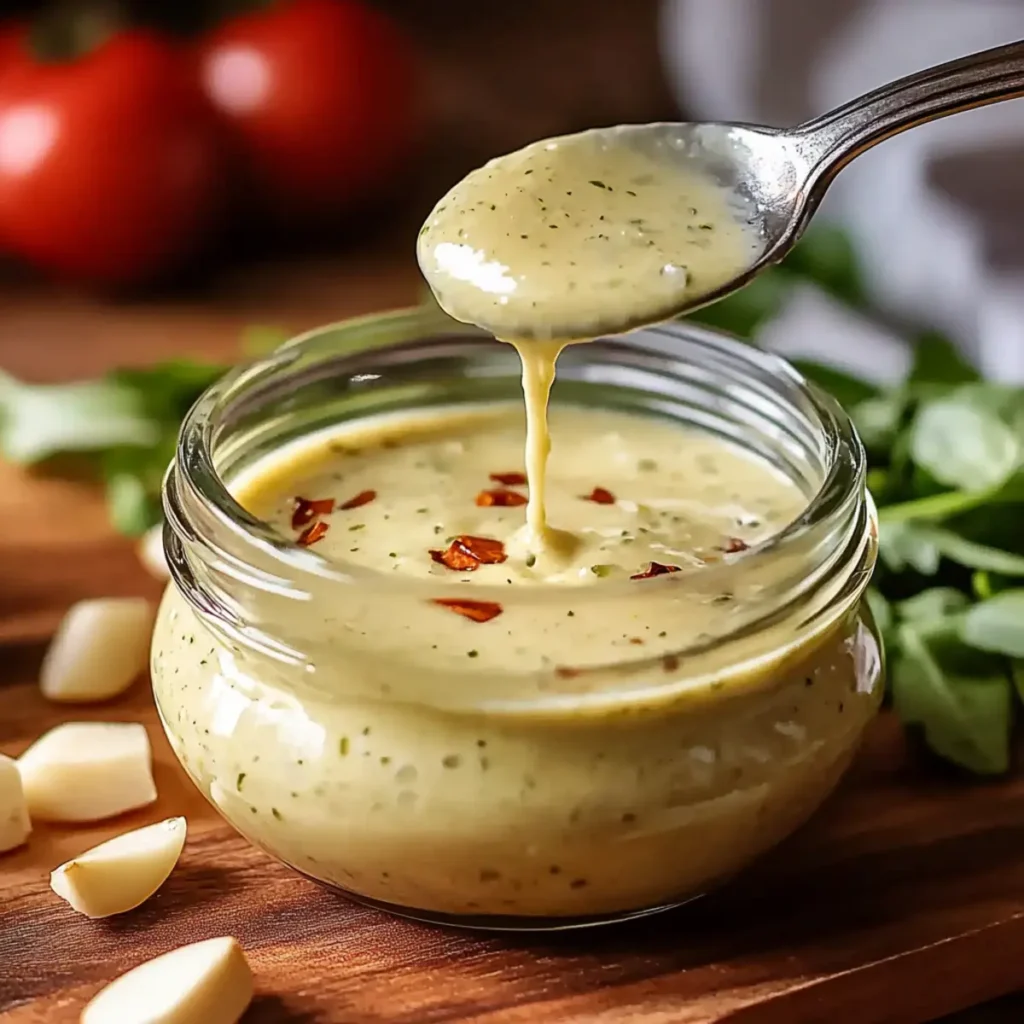
There’s something incredibly enticing about a rich, aromatic dressing that can elevate any dish from mundane to extraordinary. This CAVA-Inspired Garlic Dressing is no exception. With its smooth blend of garlic, lemon, and just the right amount of oil, it promises a burst of flavor that dances on your taste buds and leaves you craving more. Imagine drizzling this luscious concoction over a crisp salad or dunking warm pita bread into it—pure bliss! Every time I whip up this dressing, I’m reminded of lazy summer days spent with friends, gathered around a table outdoors, laughter blending with the warm breeze. It’s the kind of recipe that invokes memories of shared meals and heartfelt conversations, all sparked by the magic of flavorful ingredients. Whether it’s a casual weeknight dinner or a special gathering, this dressing makes every occasion feel like a celebration. Let’s dive into the delightful world of flavors and learn how to create this incredible CAVA-Inspired Garlic Dressing! Ingredients for CAVA-Inspired Garlic Dressing Here’s what you’ll need to make this delicious CAVA-Inspired Garlic Dressing: 1/2 cup Garlic cloves – Choose fresh, peeled garlic cloves for a stronger flavor. 1/4 cup Aquafaba – This magical liquid from canned chickpeas adds creaminess without dairy and acts as an emulsifier. 1/4 cup Lemon juice – Freshly squeezed lemon juice brings a bright acidity that balances the richness of the oil and garlic. 1 teaspoon Kosher salt – Salt enhances the overall flavors and draws out the natural sweetness of the garlic. 3/4 cup Neutral oil – Choose a flavorless oil like canola or sunflower to allow the garlic and lemon to shine through. How to Make CAVA-Inspired Garlic Dressing Follow these simple steps to prepare this delicious CAVA-Inspired Garlic Dressing: Step 1: Gather Your Ingredients Start by collecting all the ingredients listed above. Having everything within reach makes the blending process much smoother and more enjoyable. Step 2: Blend the Base Ingredients In a blender or food processor, add the garlic cloves, aquafaba, lemon juice, and kosher salt. This powerful combination will set the stage for our delightful dressing. Step 3: Blend Until Smooth Blend the mixture on high until it’s mostly smooth. The garlic should be well incorporated, releasing its aromatic essence throughout the mix. Step 4: Emulsify with Oil With the blender running, slowly drizzle in the neutral oil. This step is crucial; it transforms the mixture into a creamy, emulsified dressing that glistens with flavor goodness. Step 5: Taste and Adjust Once fully blended, take a moment to taste your creation. This is your chance to adjust the flavors! Add more salt, lemon juice, or garlic if desired to reach your perfect balance. Step 6: Serve or Store You can enjoy the dressing right away or transfer it to an airtight container for storage. It keeps well in the refrigerator and is perfect for drizzling on salads, sandwiches, or using as a dip. With this CAVA-Inspired Garlic Dressing, you’re not just preparing a sauce; you’re crafting an experience that can elevate your meals in a flash. It’s versatile, quick to make, and built on flavors that everyone can appreciate. Whether drizzled on greens, swapped for mayo in a sandwich, or used as a dip for veggies, this dressing is sure to become a staple in your kitchen. Now, imagine the compliments you’ll receive when you bring this homemade garlic dressing to a potluck, or better yet, when you sneak a taste straight from the fridge while putting together a quick dinner. It’s moments like these that remind us why we love cooking—because good food brings people together. So, roll up your sleeves, gather your ingredients, and let the magical flavors of this CAVA-Inspired Garlic Dressing inspire you! Perfecting CAVA-Inspired Garlic Dressing Cooking Process To whip up your CAVA-Inspired Garlic Dressing, begin by blending the garlic, aquafaba, lemon juice, and salt until smooth. While the blender runs, slowly add the oil to achieve a glossy, emulsified result that’s simply irresistible. Add Your Touch to CAVA-Inspired Garlic Dressing Feel free to customize your CAVA-Inspired Garlic Dressing by swapping aquafaba for a flavorful tahini or adding fresh herbs like dill or parsley for an extra kick. Experimenting keeps your taste buds entertained! Storing & Reheating CAVA-Inspired Garlic Dressing To store your CAVA-Inspired Garlic Dressing, place it in an airtight container in the refrigerator for up to a week. Reheat gently in a saucepan if the consistency thickens, stirring occasionally. The first time I made this dressing, my best friend took one taste and declared it “better than any restaurant.” That compliment fueled my obsession with perfecting this recipe. FAQs About CAVA-Inspired Garlic Dressing What is CAVA-Inspired Garlic Dressing? CAVA-Inspired Garlic Dressing is a creamy, flavorful sauce that brings a burst of garlicky goodness to your meals. This dressing features a blend of garlic cloves, aquafaba, lemon juice, and salt, emulsified with neutral oil for a rich texture. Inspired by the popular Mediterranean restaurant chain CAVA, this dressing transforms simple salads, grilled vegetables, or proteins into extraordinary culinary experiences. With its versatile ingredients, you can easily tailor it to suit your taste, making it a must-have in any home cook’s arsenal. How do I store CAVA-Inspired Garlic Dressing? To store your CAVA-Inspired Garlic Dressing, transfer it into an airtight container and keep it in the refrigerator. Properly stored, this dressing can last up to a week. If you notice the consistency thickening, simply give it a good stir or gently warm it in a saucepan until it returns to its creamy state. This ensures that you can enjoy its fresh flavors even days after preparing it, making meal prep a breeze. Can I customize CAVA-Inspired Garlic Dressing? Absolutely! One of the great things about CAVA-Inspired Garlic Dressing is its adaptability. You can swap out aquafaba with tahini for a nuttier flavor or incorporate fresh herbs like dill or parsley to elevate its taste. Feel free to experiment with different acids, such as balsamic vinegar or lime juice, for unique twists. Customizing this
15 Minute Charcuterie Board Recipe for Effortless Entertaining

There’s something utterly delightful about an effortlessly assembled platter that invites everyone to gather, chat, and snack. Picture this: a lavish spread of creamy cheeses, savory meats, and a colorful array of fruits and goodies just waiting for eager hands to dive in while laughter fills the room. Whether you’re hosting a cozy wine night with your best friends or a festive family gathering, the 15 Minute Charcuterie board is your golden ticket to impress without the stress. Imagine the burst of flavors as you mix everything from rich Brie to zesty olives, all laid out beautifully. With just a few minutes of prep and a minimal amount of fuss, you can create a feast that not only pleases the palate but also delights the eyes. Who knew you could elevate your entertaining game in just 15 minutes? Ingredients for 15 Minute Charcuterie Here’s what you’ll need to make this delicious 15 Minute Charcuterie: 1 wheel Brie: Soft and creamy, perfectly sliced for that rich indulgent touch. 8 oz Cheddar cheese: Pre-cut cubes add a sharp, tangy contrast to the creamy Brie. 1 log Blueberry goat cheese: A sweet-and-savory delight that brings a unique flavor twist. 12 oz Salami and soppressata slices: Ready-to-go meat packs that lend a savory bite to the mix. 6 oz Salami & cheese paninos: These tasty pre-rolled snacks are bursting with flavor and make everything easier. 8 oz Deli turkey or ham (Optional): Add a savory and light touch to the platter for varied textures. 3 oz Prosciutto (Optional): This delectable salty addition is perfect for balancing flavors. Pickles: Crunchy, tangy bites to wake up your taste buds. Olives: Choose a mix of green and black for a briny burst of flavor. Round buttery crackers: The perfect canvas for all your cheese and toppings. Wheat or herb-flavored crackers: For those who love a little extra zest. Fig jam: Sweet and luscious, it’s an elegant accompaniment to the cheeses. Sweet red jelly: A fun twist that adds a delightful sweetness. Honey: A drizzle of this golden goodness takes the flavor over the top. Mixed nuts (Almonds, cashews, pecans): Crunchy elements that provide great textural variety. Sweet treats: Chocolate nuggets or other candy for that well-deserved sweet end note. Sweet and salty extras (Optional): Think mini pretzels or caramel popcorn to keep things fun! Fresh rosemary or thyme sprigs (Optional): Gorgeous green accents for that professional touch. How to Make 15 Minute Charcuterie Follow these simple steps to prepare this delicious 15 Minute Charcuterie: Step 1: Gather Your Ingredients Ensure all your ingredients are ready at hand, giving you a creative playing field to set out this stunning charcuterie. Keep your platter or board nearby for easy access. Step 2: Lay Out the Cheeses Arrange the creamy Brie and cheddar cheese cubes on your platter. Don’t just plop them down; artfully position them in eye-catching clusters for visual impact. Step 3: Add the Gourmet Touch Nestle the log of blueberry goat cheese near the other cheeses. Its inviting color and unique flavor will tease everyone’s palate as they approach the table. Step 4: Layer in the Meats At this point, it’s all about the salami and soppressata slices. Layer them like an artist, and if you’re feeling fancy, fold them into fun shapes to create height and interest. Step 5: Fill Up with the Rest Scatter the salami and cheese paninos, along with optional deli turkey or prosciutto if using. Make sure to fill any gaps with the pickles, olives, and crackers to create a bountiful look. Step 6: Add Sweet and Crunchy Elements Now for the fun part! Drizzle honey over your cheese, place sweet treats around, and sprinkle mixed nuts in the empty spots. Consider sticking in some fresh rosemary or thyme to delight the senses visually. Serve immediately and watch your guests indulge while they marvel at your culinary prowess. This simple yet elegant 15 Minute Charcuterie board is sure to become your new go-to for gatherings of any sort, leaving everyone satisfied and your heart warm with the joy of sharing. Perfecting 15 Minute Charcuterie Cooking Process First, start by arranging your cheeses and meats on the platter. Next, fill in the spaces with crackers, pickles, olives, and nuts for an artful look. Finally, drizzle honey and add your jams to complete this appetizing display, ensuring no one can resist. Add Your Touch to 15 Minute Charcuterie Feel free to swap in different cheeses, like sharp gouda or creamy camembert, and replace meats with turkey or delicious smoked salmon. Add seasonal fruits or herbs to elevate the flavor and personalize your spread for every guest’s taste. Storing & Reheating 15 Minute Charcuterie Store any leftover charcuterie components in airtight containers in the fridge for up to three days. While charcuterie is best enjoyed fresh, remnants can be enjoyed cold or at room temperature without the need for reheating. My best friend still raves about the first time I made this charcuterie board for a game night—we barely had enough leftovers for breakfast! FAQs About 15 Minute Charcuterie What is 15 Minute Charcuterie? 15 Minute Charcuterie refers to a quick and impressive platter that combines a variety of cheeses, meats, crackers, and accompaniments, designed for easy assembly in just 15 minutes. This crowd-pleaser is perfect for entertaining guests without the stress of elaborate cooking. The beautiful presentation and the delightful combination of flavors make it an ideal choice for game nights, casual get-togethers, or even a cozy date night at home. Can I customize my 15 Minute Charcuterie? Absolutely! One of the delicious aspects of a 15 Minute Charcuterie is its versatility. You can tailor it to suit your taste preferences or dietary restrictions. Feel free to swap out cheeses for your favorites, use different meats like turkey or smoked salmon, and add seasonal fruits or even nuts. This flexibility ensures that each board is unique and personally crafted for your guests. What should I serve with my 15 Minute Charcuterie? A well-rounded
Easy Roasted Garlic Mushroom Recipe for Perfect Flavorful Side Dish
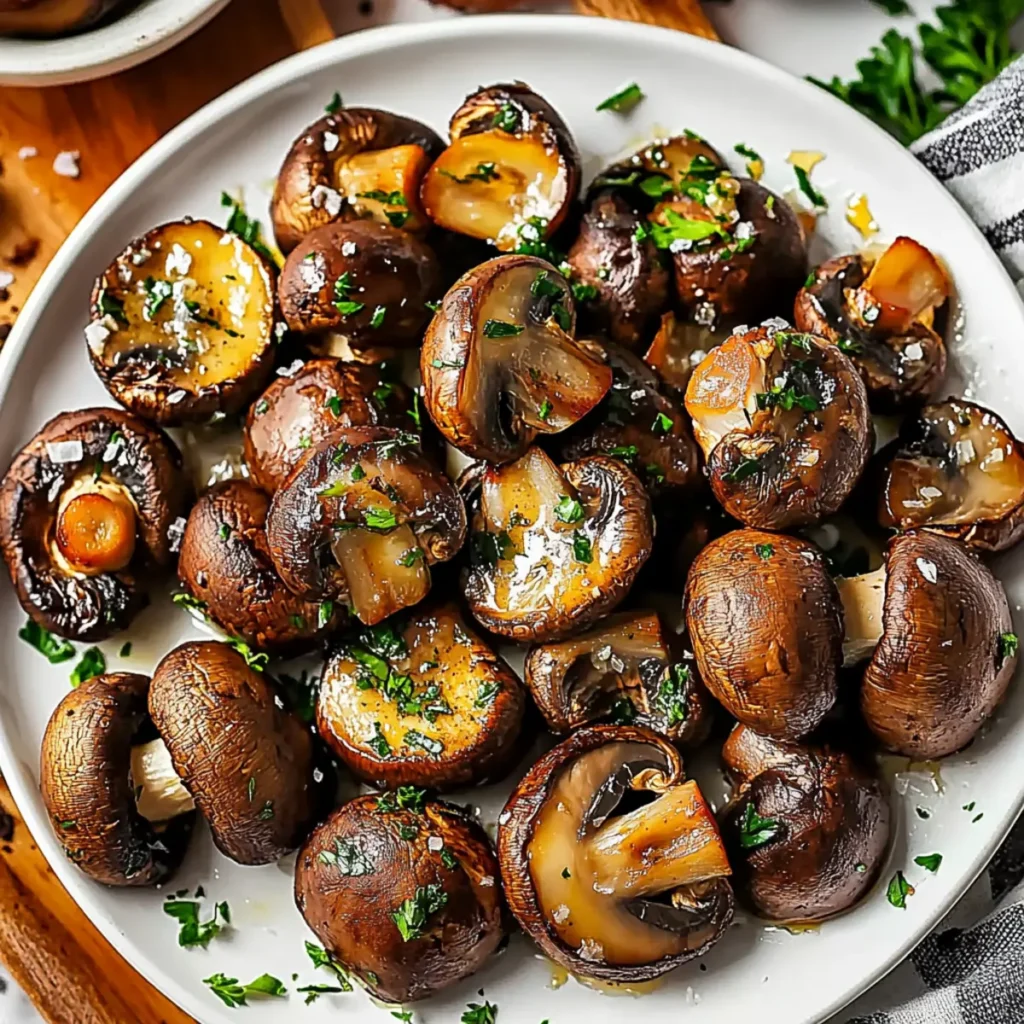
Roasted Garlic Mushroom is a delightful dish that turns any meal into a gourmet experience. The savory aroma of garlic mingling with the earthiness of mushrooms fills the air, creating an irresistible invitation to indulge. This Easy Roasted Garlic Mushroom Recipe promises to be a flavorful side dish that easily complements a variety of main courses, while also standing out on its own. Imagine gathering around the table with family or friends, the simple yet elegant dish gracing your dinner plate. Every bite is a burst of umami, with the buttery richness wrapped around tender cremini mushrooms. Whether it’s a cozy weeknight dinner or a fancy date night, this recipe ensures that your culinary skills shine. Ingredients for Easy Roasted Garlic Mushroom Recipe Here’s what you’ll need to make this delicious Easy Roasted Garlic Mushroom Recipe: 5 tablespoons melted butter – This adds richness and helps sauté the garlic and mushrooms to perfection. 4 cloves garlic – Fresh garlic elevates the dish with its aromatic qualities; feel free to add more for garlic lovers. ½ teaspoon dried thyme – Adds a subtle, earthy flavor that pairs beautifully with mushrooms. ½ teaspoon dried parsley – A hint of freshness, which balances the richness of butter and mushrooms. 1½ pounds cremini mushrooms – These mushrooms are flavorful and have a great texture; you could also use white button mushrooms if you prefer. Salt – Essential for enhancing flavors; adjust to your taste. Freshly ground black pepper – Adds a bit of spice; feel free to season to your liking. Chopped fresh parsley – For garnish, providing a pop of color and a fresh, herby bite! How to Make Easy Roasted Garlic Mushroom Recipe Follow these simple steps to prepare this delicious Easy Roasted Garlic Mushroom Recipe: Step 1: Melt the Butter In a large skillet, melt the butter over medium heat. Watch it bubble and foam—this is the beginning of something wonderful! Step 2: Sauté the Garlic Add the minced garlic to the skillet and sauté until fragrant, about 1 to 2 minutes. Make sure you don’t burn it; we want flavor, not bitterness. Step 3: Add the Herbs Stir in the dried thyme and parsley, allowing the aromatic herbs to release their delightful scents into the melted butter. Your kitchen will soon smell like a delightful herb garden. Step 4: Introduce the Mushrooms Add your clean and dried cremini mushrooms to the skillet. Stir them well to coat with the buttery herb mixture. Season with salt and freshly ground black pepper to kick up the flavor. Step 5: Cook to Perfection Allow the mushrooms to cook for approximately 20 minutes, stirring occasionally. Watch as they shrink and turn golden brown, developing their savory richness. Step 6: Garnish and Serve Once they’re tender and beautifully caramelized, transfer the mushrooms to a serving dish. Top with a sprinkle of chopped fresh parsley for a touch of color and freshness before serving. Enjoy your masterpiece alongside your favorite main dish! This easy yet impressive Easy Roasted Garlic Mushroom Recipe will have your guests begging for the recipe. It’s a versatile side that welcomes variations. You can throw in a splash of balsamic vinegar, a sprinkle of grated Parmesan, or even some red pepper flakes for an added kick, ensuring that you never get bored with it. Perfecting Easy Roasted Garlic Mushroom Recipe Cooking Process Begin by melting the butter over medium heat. Then, sauté the garlic until fragrant before adding the thyme and parsley. Next, introduce the cremini mushrooms, season to taste, and cook until tender and golden. Add Your Touch to Easy Roasted Garlic Mushroom Recipe Feel free to customize this dish by adding different types of mushrooms for varied flavors. You can also substitute the butter with olive oil for a lighter option or toss in some grated Parmesan for a cheesy twist. Storing & Reheating Easy Roasted Garlic Mushroom Recipe To store, place leftovers in an airtight container in the refrigerator for up to three days. When reheating, warm them on the stovetop over low heat to retain their flavor and texture. The first time I made this Easy Roasted Garlic Mushroom Recipe for a dinner party, my friends couldn’t stop raving about it, especially when I flaunted how few ingredients it took to create such a flavorful dish. FAQs About Easy Roasted Garlic Mushroom Recipe What is Easy Roasted Garlic Mushroom Recipe? The Easy Roasted Garlic Mushroom Recipe is a simple yet flavorful preparation that highlights the earthy taste of cremini mushrooms. Using just a handful of ingredients, including butter, garlic, and herbs, you create a dish that’s both delicious and visually appealing. This recipe is perfect for a side dish or can be enjoyed on its own, showcasing how easy it is to elevate home-cooked meals with minimal effort. It’s a fantastic choice for both casual dinners and special occasions, proving that simplicity in cooking can yield stunning results. How long does it take to prepare Easy Roasted Garlic Mushroom Recipe? This delightful Easy Roasted Garlic Mushroom Recipe takes a total of about 30 minutes to prepare. This includes roughly 10 minutes of preparation time, where you’ll clean and trim your mushrooms and mince your garlic. The cooking process is swift, with about 20 minutes needed in the skillet. This makes it a great option for busy weeknights when you want something tasty without spending hours in the kitchen. Plus, the quick cooking time allows you to whip it up alongside other dishes, making it ideal for meal prepping or entertaining. Can I customize the Easy Roasted Garlic Mushroom Recipe? Absolutely! One of the best things about the Easy Roasted Garlic Mushroom Recipe is its versatility. You can experiment with different types of mushrooms, such as shiitake or portobello, for varying flavors and textures. If you’re looking for a lighter option, swap out the butter for olive oil. For a cheesy twist, consider adding grated Parmesan or a sprinkle of feta before serving. This recipe invites you to
Cheese-Stuffed Garlic Knots Recipe with Easy Biscuit Dough Tips

There’s just something magical about the aroma of freshly baked goods that brings a smile to my face. And when it comes to the heavenly blend of garlic, melted cheese, and warm, fluffy biscuit dough, you know you’re in for a treat. Yes, I’m talking about the delightful Cheese-Stuffed Garlic Knots Recipe with Easy Biscuit Dough, which makes every moment feel a little brighter. Whether you’re prepping for game night, a cozy evening in, or just want to impress your friends and family, these little bites of joy always hit the spot. Picture this: you pull the knots from the oven, and as you break one apart, the gooey mozzarella stretches like a warm embrace, while the garlicky butter glistens on top. These heavenly knots are perfect for dipping, snacking, or even as a side dish. Trust me, once you try them, you’ll find excuses to whip them up again and again. Ingredients for Cheese-Stuffed Garlic Knots Recipe with Easy Biscuit Dough Here’s what you’ll need to make this delicious Cheese-Stuffed Garlic Knots Recipe with Easy Biscuit Dough: 1 16.3 oz can Pillsbury Grands Flakey Layers Biscuits – Using these flaky layers ensures that your knots are buttery and tender while saving you loads of time. 8 oz mozzarella cheese – Cut into 16 cubes to create that tantalizing, cheesy center that’s ooey-gooey with every bite. 1 tablespoon grated Pecorino Romano cheese (or Parmesan) – This adds a wonderful salty nuttiness that elevates the flavor to new heights. 4 tablespoons unsalted butter (melted, or olive oil) – The melted butter helps achieve that golden-brown color and adds richness to the dish. 3 large cloves garlic (minced) – Fresh garlic infuses the knots with a fragrant aroma, making your kitchen smell divine. ¾ teaspoon Italian seasoning – A blend of herbs that perfectly complements the garlic and cheese, bringing authentic Italian flavors to the party. ½ tablespoon freshly chopped parsley (for garnish) – This adds a pop of color and a fresh, herby note to finish your knots beautifully. How to Make Cheese-Stuffed Garlic Knots Recipe with Easy Biscuit Dough Follow these simple steps to prepare this delicious Cheese-Stuffed Garlic Knots Recipe with Easy Biscuit Dough: Step 1: Preheat Your Oven Preheat the oven according to the biscuit dough instructions, usually to 350°F (175°C). While the oven warms up, prepare your baking sheet by lining it with parchment paper for easy cleanup later. Step 2: Separate the Biscuits Open the can of biscuits and gently separate each biscuit. This is often a pop-to-open moment, and I can’t help but feel excitement as the can releases that satisfying sound. Step 3: Flatten and Fill Take one biscuit and flatten it with your hands. Place a cube of mozzarella cheese in the center before folding the dough over the cheese. Pinch to seal it tightly, ensuring the cheese doesn’t escape during baking. Step 4: Shape into Knots Carefully roll the filled biscuit into a knot shape, twisting it gently. Repeat this process for all the biscuits and cheese cubes until your baking sheet is filled with these delightful knots. Step 5: Prepare the Garlic Mixture In a bowl, mix the melted butter, minced garlic, and Italian seasoning. The scent of garlic will make you feel like a master chef already! Use a pastry brush to generously coat each knot with this fragrant mixture, making sure to get some garlic bits on there too. Step 6: Bake to Perfection Arrange the knots on a baking sheet and bake according to the biscuit dough instructions or until they turn beautifully golden brown, usually about 15-20 minutes. Once they are hot out of the oven, sprinkle them with grated Pecorino Romano cheese and garnish with freshly chopped parsley. Transfer those golden little knots to a serving platter and watch as your friends and family dive in. Feel free to serve with marinara sauce or a creamy dip for that extra oomph! You’ve created a fantastic appetizer or snack that everyone will rave about, all thanks to this Cheese-Stuffed Garlic Knots Recipe with Easy Biscuit Dough! This recipe not only brings smiles but also warmth and joy, proving that sometimes, the simplest dishes create the most cherished memories. Happy baking! This showstopping Cheese-Stuffed Garlic Knots Recipe with Easy Biscuit Dough delivers restaurant-quality results using simple ingredients you probably already have at home. The perfect balance of textures and flavors creates an unforgettable dining experience that will have everyone asking for seconds. Picture-perfect presentation with vibrant colors makes this dish absolutely Instagram-worthy and guaranteed to impress any dinner guest. Incredibly versatile recipe that works beautifully for weeknight dinners, meal prep, special occasions, or even outdoor entertaining sessions. Perfecting Cheese-Stuffed Garlic Knots Recipe with Easy Biscuit Dough Cooking Process Preheat the oven first, so it’s hot and ready. While preparing your ingredients and assembling the knots, keep an eye on the oven. Bake them until golden brown for the best results. Add Your Touch to Cheese-Stuffed Garlic Knots Recipe with Easy Biscuit Dough Feel free to swap mozzarella for cheddar or pepper jack for a kick. Add spinach or sun-dried tomatoes for extra flavor and nutrition. The possibilities are endless, so get creative! Storing & Reheating Cheese-Stuffed Garlic Knots Recipe with Easy Biscuit Dough Store leftover knots in an airtight container in the fridge for up to three days. Reheat in the oven at 350°F for about 10 minutes to restore their fluffiness and flavor. Sometimes, I whip up these cheese-stuffed garlic knots for gatherings, and they vanish faster than I can say “more cheese, please.” Friends always ask for the recipe, and honestly, it never gets old sharing it! FAQs About Cheese-Stuffed Garlic Knots Recipe with Easy Biscuit Dough What is Cheese-Stuffed Garlic Knots Recipe with Easy Biscuit Dough? The Cheese-Stuffed Garlic Knots Recipe with Easy Biscuit Dough is a delightful treat that combines fluffy biscuit dough with gooey melted cheese and aromatic garlic. This recipe is perfect for snack lovers and can be prepared quickly using
Delicious Shawarma Garlic Sauce Recipe for Authentic Flavor Boost
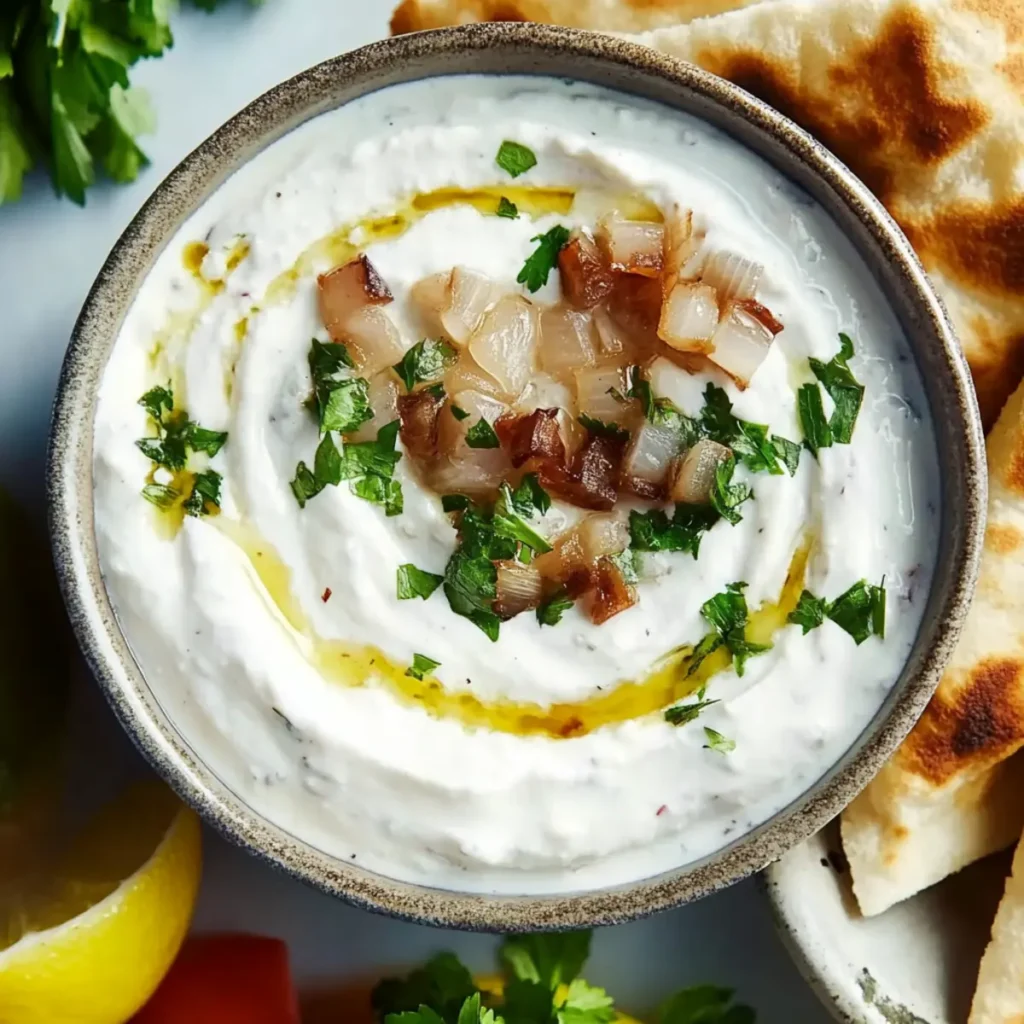
The aroma of garlic wafting through your kitchen is like a warm hug for your senses. This delicious shawarma garlic sauce recipe for authentic flavor will make your taste buds dance with joy. Imagine creamy, garlicky goodness that elevates any dish it touches. Whether drizzled over grilled chicken, slathered on pita, or simply enjoyed with fresh veggies, this velvety sauce is a game-changer. As someone who once stood in a bustling Middle Eastern market, captivated by the vibrant sights and intoxicating smells, I can assure you that a good garlic sauce is essential for a truly unforgettable meal. This is the kind of sauce that brings your favorite takeout right into your home, giving you the power to impress your family and friends—all while feeling like an exotic chef extraordinaire. So, grab your food processor, and let’s get ready to whip up a batch of this phenomenal sauce! Ingredients for Delicious Shawarma Garlic Sauce Recipe for Authentic Flavor Here’s what you’ll need to make this delicious Delicious Shawarma Garlic Sauce Recipe for Authentic Flavor: 1 cup garlic cloves – For that strong, aromatic flavor, use fresh garlic cloves. Avoid pre-peeled options to maintain vibrant taste. 2 teaspoons Kosher salt – This will enhance the flavors and ensure your sauce is well-seasoned, so don’t skimp on it. 3 cups neutral oil – A light oil like canola or vegetable oil keeps the sauce creamy without overpowering the garlic taste. ½ cup lemon juice – Freshly squeezed lemon juice brings the perfect tang to balance the rich garlic infusion. How to Make Delicious Shawarma Garlic Sauce Recipe for Authentic Flavor Follow these simple steps to prepare this delicious Delicious Shawarma Garlic Sauce Recipe for Authentic Flavor: Step 1: Prep the Garlic Start by peeling your garlic cloves. You can use a knife to give them a little smash to make peeling easier. Fresh garlic is key, so pay attention to that funky smell of pre-minced jars—not what you want here! Step 2: Blend the Garlic and Salt In your trusty food processor, combine the peeled garlic cloves and Kosher salt. Blend until the mixture is smooth. You want this creamy base to set the stage for your sauce. Step 3: Drizzle in the Oil With the processor running, slowly drizzle in the neutral oil. This should resemble a garlic-infused magic potion. Keep blending until your sauce reaches a creamy consistency that you can’t resist. Step 4: Add the Lemon Juice Finally, add the lemon juice while the processor is still running. This bright ingredient will add zing and enhance the flavors even more. Taste and adjust the lemon to your liking! Step 5: Serve and Enjoy Transfer your completed sauce to a beautiful serving bowl. It’s perfect for dipping and drizzling! Pair it with shawarma, grilled meats, or even just pita and veggies for a satisfying meal. Step 6: Store Leftovers If you somehow have leftovers (which is doubtful with a flavor this good), store the sauce in an airtight container in the fridge. It should hold up well for about a week—if it lasts that long! This mouthwatering garlic sauce will have your friends drooling and questioning why they ever bothered with takeout. Say goodbye to bland meals and hello to an aromatic explosion of flavors that will make your dishes sing! Now, grab that food processor and give this recipe a whirl. Whether you’re hosting a dinner party or simply sprucing up a weeknight dinner, this delicious shawarma garlic sauce recipe for authentic flavor is just what you need to take your cooking to new heights. Enjoy! This showstopping Delicious Shawarma Garlic Sauce Recipe for Authentic Flavor delivers restaurant-quality results using simple ingredients you probably already have at home. The perfect balance of textures and flavors creates an unforgettable dining experience that will have everyone asking for seconds. Picture-perfect presentation with vibrant colors makes this dish absolutely Instagram-worthy and guaranteed to impress any dinner guest. Incredibly versatile recipe that works beautifully for weeknight dinners, meal prep, special occasions, or even outdoor entertaining sessions. Perfecting Delicious Shawarma Garlic Sauce Recipe for Authentic Flavor Cooking Process To achieve the best results with your Delicious Shawarma Garlic Sauce Recipe for Authentic Flavor, start by blending the garlic and salt. Drizzle in the oil slowly as the processor runs. Just before it’s done, add the lemon juice to elevate the flavors beautifully. Add Your Touch to Delicious Shawarma Garlic Sauce Recipe for Authentic Flavor Feel free to customize this Delicious Shawarma Garlic Sauce Recipe for Authentic Flavor to suit your taste. You might swap in some roasted garlic for a sweeter, milder flavor or add a pinch of cayenne pepper for a spicy kick that’ll make your taste buds dance. Storing & Reheating Delicious Shawarma Garlic Sauce Recipe for Authentic Flavor After preparing your Delicious Shawarma Garlic Sauce Recipe for Authentic Flavor, store it in an airtight container in the fridge for up to a week. To reheat, simply bring it to room temperature before serving, luscious and creamier than ever. Sometimes, my friends exclaim, “What sorcery is this?” after tasting this sauce! That simple compliment has turned many of my get-togethers into unforgettable food fests, where second and third servings are the norm. FAQs About Delicious Shawarma Garlic Sauce Recipe for Authentic Flavor What is Delicious Shawarma Garlic Sauce Recipe for Authentic Flavor? The Delicious Shawarma Garlic Sauce Recipe for Authentic Flavor is a rich, creamy sauce made primarily from garlic, salt, oil, and lemon juice. This sauce is famous for its robust flavor, commonly served with shawarma, grilled meats, and various Middle Eastern dishes. It elevates your meals with a zesty kick and a smooth texture that keeps everyone coming back for more. This sauce not only enhances the taste of your dishes but also adds an authentic touch to your home-cooked meals, making them restaurant-quality with minimal effort. How do I store Delicious Shawarma Garlic Sauce? After preparing your Delicious Shawarma Garlic Sauce Recipe for Authentic Flavor, it’s crucial to
Delicious Fire Roasted Salsa Recipe for Flavorful Dips at Home

So, you’re craving a flavor explosion that dances on your taste buds like no other? You’ve come to the right place! This delicious Fire Roasted Salsa recipe for flavorful dips is about to take your snacking game to a whole new level. Picture the rich, smoky aroma of fire-roasted tomatoes, their slightly blistered skins giving way to juicy goodness, mingling with the earthy crunch of fresh peppers and zesty cilantro. Yes, please! Blistering ripe tomatoes, spicy jalapeños, and sweet onions brings out an incredible smoky depth of flavor that store-bought jarred salsa simply cannot match. With a squeeze of fresh lime juice and a generous handful of fragrant cilantro, this vibrant homemade fire-roasted salsa is the quintessential dip for tortilla chips, tacos, and grilled steaks. Ingredients for Delicious Fire Roasted Salsa Recipe for Flavorful Dips Here’s what you’ll need to make this delicious Delicious Fire Roasted Salsa Recipe for Flavorful Dips: 1.75 lbs Roma tomatoes – Ideal for their sweet flavor and meaty texture, perfect for roasting. 1 medium poblano pepper – Adds rich smokiness while being mild enough for everyone to enjoy. 1 medium jalapeño pepper – For those who love a little heat; seed it if you prefer less spice. 6 cloves garlic – Use peeled and whole to transform their sharp flavor into sweet richness when roasted. 1 medium yellow onion – Chopped into chunks; roasting mellows its bite and enhances sweetness. 2 Tbsp olive oil – A drizzle to help achieve that golden-brown, crispy finish on your veggies. 1 medium lime – The juice adds brightness and balances the deeper roasted flavors perfectly. 0.5 bunch cilantro – Fresh leaves will lend a vibrant green freshness, which sings in this salsa. 1 tsp salt – Essential for enhancing flavors; adjust to taste based on your preferences. 0.5 tsp cumin – Adds warmth and depth, giving your salsa a slightly more complex character. 0.5 tsp sugar – A pinch to help balance acidity and enhance all the rich flavors. How to Make Delicious Fire Roasted Salsa Recipe for Flavorful Dips Follow these simple steps to prepare this delicious Delicious Fire Roasted Salsa Recipe for Flavorful Dips: Step 1: Preheat and Prepare Preheat your oven to a sizzling 450ºF (230ºC) and line a baking sheet with foil. Start by cutting the stems off the Roma tomatoes and halving them. Peel the garlic and get chopping with that yellow onion into fairly large chunks. Lay all the veggies, including the poblano and jalapeño, on the prepared baking sheet like they’re the star of a culinary performance. Drizzle with olive oil, then toss everything together until coated. Step 2: Roast the Veggies Slide that baking sheet into the oven and roast for about 30 minutes. Halfway through, give the veggies a little stir, making sure they all get their fair share of the heat. The idea here is to wait until they become shriveled, blistered, and slightly brown, releasing an incredible aroma that will have your neighbors peeking in. Step 3: Cool and Prep the Peppers Once out of the oven, let those fragrant veggies cool for a moment. Meanwhile, on a cutting board, get all hands-on with that poblano. Remove the skin and slice off the stems, then slice it open lengthwise before scraping out the seeds to ensure it’s mild (unless you’re feeling adventurous, then leave a few seeds!). Step 4: Blend and Mix Place the roasted veggies, including all those delicious juices, into a blender or food processor. If they’re still warm, you might want to pop the blender into the fridge for a few minutes to avoid a steamy explosion of salsa. Once cooled, add the fresh cilantro leaves, lime juice, salt, sugar, and cumin. Pulse the mixture until it’s well combined but still has a slightly chunky texture. Step 5: Taste and Adjust Salsa perfection is all about personal taste! Take a little taste test and adjust any seasonings as needed, be they salt or more lime juice for that extra zing. Sometimes, it just needs a little tweaking to reach its full potential. Step 6: Serve or Store Now you can serve this vibrant salsa immediately with your favorite tortilla chips or in tacos, or you could refrigerate it overnight. Trust me; giving those flavors more time to mingle works wonders for the taste! Enjoy this delicious fire roasted salsa recipe as a flavorful dip that will leave you and your guests wanting more. You might even start planning your next fiesta just to have a reason to whip it up again! This showstopping Delicious Fire Roasted Salsa Recipe for Flavorful Dips delivers restaurant-quality results using simple ingredients you probably already have at home. The perfect balance of textures and flavors creates an unforgettable dining experience that will have everyone asking for seconds. Picture-perfect presentation with vibrant colors makes this dish absolutely Instagram-worthy and guaranteed to impress any dinner guest. Incredibly versatile recipe that works beautifully for weeknight dinners, meal prep, special occasions, or even outdoor entertaining sessions. Perfecting Delicious Fire Roasted Salsa Recipe for Flavorful Dips Cooking Process To create the best flavor, start by roasting your vegetables at high heat for maximum caramelization. While they roast, prep your blender and gather your spices for a streamlined, efficient cooking sequence that ensures every component shines. Add Your Touch to Delicious Fire Roasted Salsa Recipe for Flavorful Dips Feel free to switch up the ingredients! Try adding some diced mango for sweetness or a handful of corn for crunch. You can also explore different herbs like parsley or basil for a unique flavor profile. Storing & Reheating Delicious Fire Roasted Salsa Recipe for Flavorful Dips Store your salsa in an airtight container in the fridge for up to a week. If you want to serve it warm, gently reheat it on the stovetop while stirring to maintain its texture. Sharing this roasted salsa at my last family gathering was a total game-changer. Everyone kept raving about it, and I even caught my two cousins
Delicious Italian Sub Sliders Recipe Perfect for Game Day Delight

There’s nothing quite like the aroma of warm, cheesy Italian Sub Sliders wafting through the air, ready to steal the show at your next gathering. This delicious Italian Sub Sliders recipe is perfect for game day, combining the irresistible flavors of salami, capicola, and pepperoni, all nestled between soft Hawaiian rolls. With each bite, you’ll be transported to a bustling Italian deli, where the sandwiches are as big as your appetite! Whether you’re cheering for your team, hosting a casual Friday night in, or simply craving something hearty and satisfying, these sliders are the ultimate comfort food. The blend of gooey cheese, zesty meats, and fresh veggies creates the perfect bite, guaranteeing you’ll make a complete fool of yourself as you reach for seconds — and possibly thirds. So grab your apron and let’s assemble this crowd-pleaser! Ingredients for Delicious Italian Sub Sliders Recipe Perfect for Game Day Here’s what you’ll need to make this delicious Delicious Italian Sub Sliders Recipe Perfect for Game Day: 3 Tbsp unsalted butter – ensures a rich flavor and helps crisp the slider tops to golden perfection. 1 tsp Rustic Ranch Seasoning – adds a delightful mix of herby goodness to elevate the flavor profile. 1 tsp Vik’s Garlic Fix! Spice Blend – because garlic makes everything better and adds a nice punch! 12 ea Hawaiian rolls – soft, sweet, and perfect for soaking up all those delicious flavors. 8 slices provolone cheese – creamy and melty, allowing each bite to feel luxuriously indulgent. 8 slices Genoa salami – traditional Italian taste that adds a delightful balance of spice and richness. 8 slices Capicola ham – a must-have for that smoky taste that sings in harmony with the salami. 10 slices sandwich pepperoni – for a burst of flavor and that touch of nostalgia from your childhood pizza parties. ¼ cup mayonnaise – creamy base that ties the flavors together beautifully. 1 Tbsp red wine vinegar – offers a tangy zest that brightens the dish and balances the richness. ½ tsp Italian Herb Spice Blend – for gently lifting the taste with a blend of classic Italian herbs. 2 cups finely shredded iceberg lettuce – provides a refreshing crunch that rounds out the sliders. ¼ cup thinly shaved red onion – adds some zing and color to each bite. ¼ cup chopped roasted red pepper – gives a sweet and smoky flavor that’s downright addictive. ¼ cup sliced pepperoncini peppers – a little heat and pickled goodness that wakes up your palate, making everything come alive. ¼ cup sliced pitted olives (optional) – add if you love a briny touch that complements the savory meats beautifully. How to Make Delicious Italian Sub Sliders Recipe Perfect for Game Day Follow these simple steps to prepare this delicious Delicious Italian Sub Sliders Recipe Perfect for Game Day: Step 1: Preheat the Oven Preheat your oven to 350°F (175°C) to prepare for the baking magic about to unfold. Step 2: Prepare the Butter Mixture In a small bowl, combine the unsalted butter, Rustic Ranch Seasoning, Vik’s Garlic Fix! Spice Blend, and red wine vinegar. Stir until well mixed and fragrant. Step 3: Slice and Arrange the Rolls Carefully slice the Hawaiian rolls in half horizontally, creating a top and bottom half. Lay the bottom halves in a greased baking dish, ensuring they’re snug like a warm hug. Step 4: Slather on the Mayonnaise Spread the creamy mayonnaise generously over the bottom halves of the rolls, ensuring coverage as this adds flavor and helps the ingredients stick. Step 5: Layer the Yummy Ingredients Start layering by placing provolone cheese on the mayo, then add the Genoa salami, Capicola ham, and pepperoni. Next, top this meaty mountain with iceberg lettuce, red onion, roasted red peppers, pepperoncini, and olives if using. Step 6: Cap It Off Place the top halves back onto the loaded bottom halves. Brush the prepared butter mixture lovingly over the tops to give these sliders a golden, crunchy finish. Step 7: Bake to Perfection Cover the baking dish with foil and bake for 15 minutes. After that, remove the foil and bake for an additional 3 minutes or until the tops are delightfully golden brown. Step 8: Serve and Enjoy Once out of the oven, let these sliders cool for a minute before cutting them into individual portions. Serve warm, and watch your friends and family disappear faster than your favorite team scoring a touchdown! Now that you’ve got the lowdown on making these sliders, get ready to be crowned the game day hero. Enjoy the delicious Italian Sub Sliders recipe, and may your gatherings always be filled with laughter, joy, and amazing flavors! Perfecting Delicious Italian Sub Sliders Recipe Perfect for Game Day Cooking Process The key to success with this Delicious Italian Sub Sliders Recipe Perfect for Game Day is to prepare your ingredients beforehand. Start by mixing the butter and spices, then slice the rolls and layer the fillings while the oven preheats. Add Your Touch to Delicious Italian Sub Sliders Recipe Perfect for Game Day Feel free to customize this Delicious Italian Sub Sliders Recipe Perfect for Game Day by adding your favorite cheeses, swapping the meats for turkey or grilled veggies, or even adding a layer of pesto for an extra flavor kick. Storing & Reheating Delicious Italian Sub Sliders Recipe Perfect for Game Day To store leftovers from your Delicious Italian Sub Sliders Recipe Perfect for Game Day, place them in an airtight container. When you’re ready to enjoy them again, reheat in the oven at 350°F for about 10 minutes for a fresh-out-of-the-oven taste. A few months ago, I surprised my friends with these sliders during a game night, and they were a total hit! Everyone kept asking for the recipe, and I felt like a culinary rock star. FAQs About Delicious Italian Sub Sliders Recipe Perfect for Game Day What is Delicious Italian Sub Sliders Recipe Perfect for Game Day? Delicious Italian Sub Sliders Recipe Perfect for
Savory Nutritional Yeast Power Dressing: Quick & Healthy Recipe
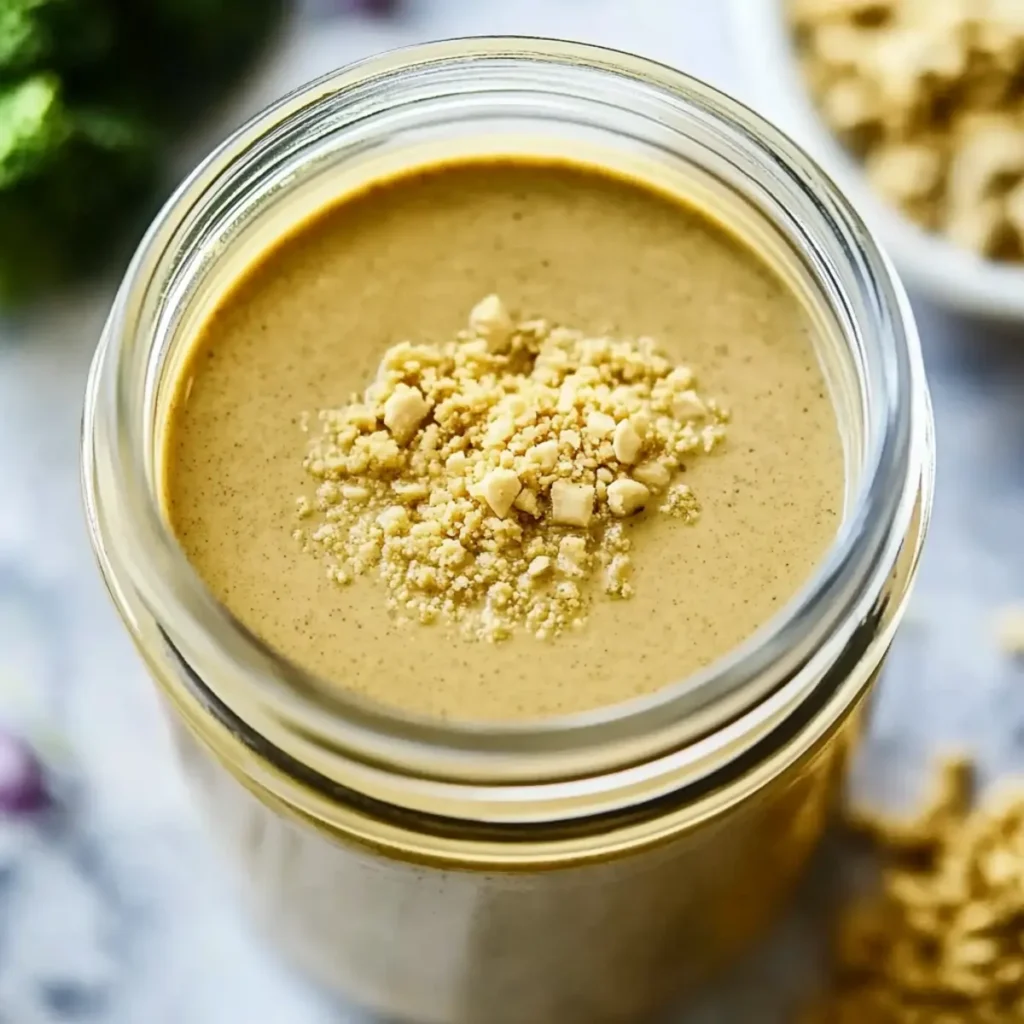
The Savory Nutritional Yeast Power Dressing is a magical elixir that can transform your mundane salads into vibrant, flavor-packed sensations. Imagine a velvety dressing that dances on your taste buds, combining the nuttiness of nutritional yeast with zesty apple cider vinegar and the richness of olive oil. It’s the kind of dressing that makes you wonder how you ever enjoyed a salad without it. Whether you’re preparing a weekday lunch or entertaining friends on the weekend, this dressing is versatile and perfect for any occasion. Drizzle it over grilled vegetables, toss it with crisp greens, or use it as a zippy dip for your favorite snacks. You’ll find yourself smuggling it into every meal! Ingredients for Savory Nutritional Yeast Power Dressing Here’s what you’ll need to make this delicious Savory Nutritional Yeast Power Dressing: 1 cup nutritional yeast – This star ingredient adds a cheesy, nutty flavor, perfect for enhancing the dressing’s taste without dairy. ⅓ cup apple cider vinegar – The tangy base that brings brightness and acidity, balancing out the richness of the oil. 1 tablespoon apple cider vinegar – A little extra zing to elevate the flavor profile and provide a sharp contrast to the other ingredients. ¼ cup coconut aminos or low-sodium tamari or soy sauce – Use these for a gluten-free option or to add a savory depth that enhances the umami of the dressing. 3 cloves garlic (minced) – Fresh garlic contributes a robust aroma and flavor that are essential in making this dressing truly unforgettable. 1 pinch sea salt – A bit of salt helps draw out the flavors of all the ingredients, bringing harmony to the dressing. Ground pepper (to taste) – Add some spice here! Black pepper gives a light kick that contrasts beautifully with the creamy elements. ⅓ cup extra-virgin olive oil – This lovely oil adds richness and smoothness, making the dressing a perfect drizzle for your dishes. How to Make Savory Nutritional Yeast Power Dressing Follow these simple steps to prepare this delicious Savory Nutritional Yeast Power Dressing: Step 1: Gather Your Ingredients Start by collecting all the ingredients you need for this delightful dressing. It’s a fantastic way to prep your mind for the tasty adventure ahead! Step 2: Blend the Base In a blender, combine the nutritional yeast, both measurements of apple cider vinegar, coconut aminos or tamari, minced garlic, sea salt, and ground pepper. Blend until everything is smooth and well combined. Step 3: Emulsify the Oil With the blender running on low, gradually pour in the extra-virgin olive oil. This action creates an emulsion, making the dressing creamy and smooth. You can watch as it transforms into a luscious liquid! Step 4: Taste and Adjust Once it’s blended to perfection, give the dressing a taste. Does it need more salt, pepper, or acidity? Don’t hesitate to adjust accordingly. This is your dressing; make it your own! Step 5: Store It Right Transfer the Savory Nutritional Yeast Power Dressing to a glass jar or airtight container. It can be stored in the refrigerator for up to a week, but I bet it won’t last that long! Step 6: Serve and Enjoy Now comes the best part—drizzle it over your favorite salads, vegetables, or even use it as a dip for fresh veggies. Just think of all the excitement waiting on your plate! This Savory Nutritional Yeast Power Dressing is not just a condiment; it’s an experience. With its unique blend of flavors, it invites you to reimagine how you approach your meals. So go ahead, treat yourself and those you care about to a dressing that combines health, flavor, and versatility—all in one delightful bottle. Enjoy your culinary journey! Perfecting Savory Nutritional Yeast Power Dressing Cooking Process To ensure that your Savory Nutritional Yeast Power Dressing comes out perfectly every time, start by blending all ingredients except for the olive oil. Then, while blending, drizzle in the olive oil slowly to create that creamy texture. Add Your Touch to Savory Nutritional Yeast Power Dressing Feel free to customize your Savory Nutritional Yeast Power Dressing! Swap coconut aminos for soy sauce if desired, add lime juice instead of vinegar, or toss in fresh herbs like parsley or basil for an extra flavor boost. Storing & Reheating Savory Nutritional Yeast Power Dressing Store any leftover Savory Nutritional Yeast Power Dressing in an airtight container in the fridge for up to a week. If it thickens, simply whisk in a little water or extra olive oil before use to regain that smooth consistency. Sometimes, I whip up this dressing for friends, and their eyes light up like it’s the secret sauce to life itself. Nothing like receiving a round of applause for simply blending up some ingredients! FAQs About Savory Nutritional Yeast Power Dressing What is Savory Nutritional Yeast Power Dressing? Savory Nutritional Yeast Power Dressing is a versatile and delicious dressing made primarily from nutritional yeast, apple cider vinegar, and olive oil. It boasts a unique flavor profile, combining the nutty taste of nutritional yeast with the tanginess of vinegar and the richness of olive oil. This dressing is not only a fantastic way to enhance your salads and roasted vegetables but also serves as a wonderful dip for snacks. Plus, it’s packed with nutrients, making it a healthy addition to your meals. Can I customize Savory Nutritional Yeast Power Dressing? Absolutely! One of the great things about Savory Nutritional Yeast Power Dressing is its adaptability. Feel free to swap coconut aminos for soy sauce or even use lime juice instead of apple cider vinegar. Want to jazz it up a notch? Toss in fresh herbs like parsley or basil for an additional flavor burst. The beauty of this dressing lies in your ability to tweak it to suit your taste preferences, so don’t hesitate to get creative! How long does Savory Nutritional Yeast Power Dressing last? When stored properly, Savory Nutritional Yeast Power Dressing can last up to a week in the refrigerator. It’s essential
Delicious Traditional Caesar Dressing Recipe for Perfect Salads
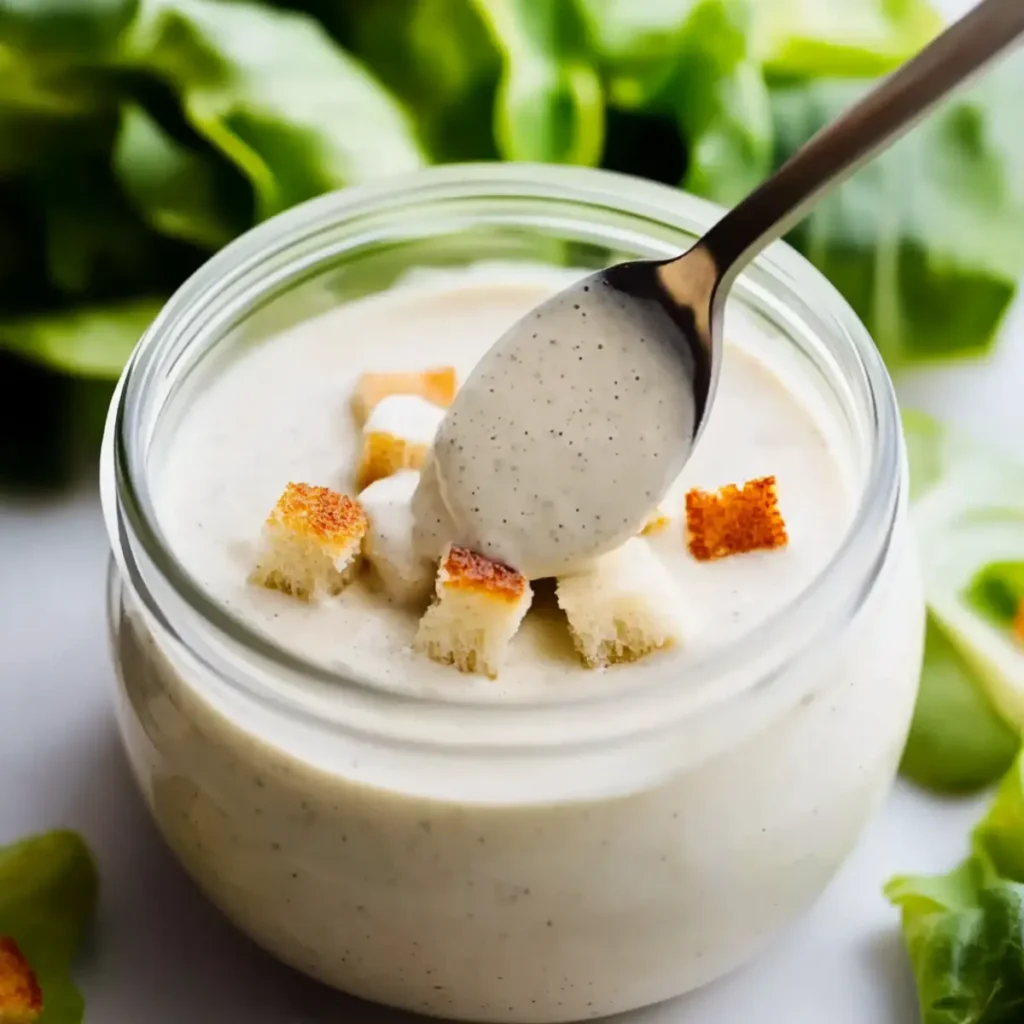
The aroma of a freshly tossed salad drizzled with creamy, tangy dressing can elevate a simple meal into something extraordinary. If you’re looking for a Delicious Traditional Caesar Dressing Recipe for Perfect Salads, you’ve landed in the right spot. The combination of garlic, anchovies, and a splash of fresh lemon juice creates a flavor explosion that will have your taste buds dancing. Picture this: it’s a warm summer evening, and you’re hosting friends for a backyard barbecue. You whip up a Caesar salad as you reminisce about a trip to Italy where you first tasted this delightful dressing. Every rich, tangy spoonful reminds you of sun-drenched days and laughter shared around a table filled with delicious food. It’s these moments that make this dressing not just a recipe, but a cherished experience, ready to transform your salads into show-stopping delights. Ingredients for Delicious Traditional Caesar Dressing Recipe for Perfect Salads Here’s what you’ll need to make this delicious Delicious Traditional Caesar Dressing Recipe for Perfect Salads: 1 clove garlic – Freshly sliced for an aromatic kick that’s essential for authentic Caesar dressing. 1 rib celery – Adds crunch and a subtle earthiness to balance the flavors. 1/2 medium onion – Use a sweet variety for a mild, flavorful base that enhances the dressing. 1 teaspoon pepper – Freshly cracked for the best flavor; feel free to adjust according to your taste. 1 heaping teaspoon salt – Essential for seasoning the dressing and bringing all the flavors together. 1 can anchovies (2 oz in oil) – Packed with umami, these little fish are the secret to a classic Caesar flavor. 1/2 teaspoon sugar – A touch of sweetness to balance the dressing’s acidity. 2 tablespoons mustard – Adds depth and a bit of tanginess to the mix. 1 tablespoon fresh lemon juice – Brightens the dressing and enhances all the other flavors. 3 eggs – These act as a base for the dressing, providing creaminess and richness. 2 cups vegetable oil – The backbone of the dressing, creating the desired smooth consistency. How to Make Delicious Traditional Caesar Dressing Recipe for Perfect Salads Follow these simple steps to prepare this delicious Delicious Traditional Caesar Dressing Recipe for Perfect Salads: Step 1: Gather Your Ingredients Start by bringing together all your ingredients. You’ll need a sturdy blender to create that creamy concoction everyone loves. If you don’t have a blender, a food processor will work as well, just be prepared to give it a good workout. Step 2: Blend the Base In your blender, combine the sliced garlic, cut-up celery, cut-up onion, pepper, salt, anchovies, sugar, mustard, lemon juice, and eggs. This mixture will form the flavorful base of your dressing, so make sure to scrape every bit down the sides as needed. Step 3: Add the Oil Slowly With the blender running, slowly drizzle in the vegetable oil. This is where the magic happens! The dressing will begin to emulsify and become smooth. If you’re using a food processor, you might need to stop and scrape down the sides occasionally. Step 4: Taste and Adjust Now’s your chance to fine-tune the flavors. Give the dressing a taste and decide if it needs a bit more salt, a squeeze of lemon, or perhaps a little more pepper for kick. Step 5: Chill and Serve Once you’re satisfied with the flavor, transfer your Caesar dressing to an airtight container and pop it in the fridge for at least 30 minutes. This chilling time allows all those delicious flavors to meld together beautifully. Step 6: Dress Your Salad When you’re ready to enjoy, prepare your salad – crisp romaine lettuce, croutons, and a sprinkle of Parmesan cheese work wonderfully. Drizzle your freshly made Caesar dressing generously over the top, toss, and serve immediately. Trust me; your friends won’t be able to resist going back for seconds. This Delicious Traditional Caesar Dressing Recipe for Perfect Salads not only enhances your green creations but also brings a burst of flavor that makes you feel like a gourmet chef in your own kitchen. Whether it’s a casual dinner or an elegant party, this dressing is sure to be a crowd-pleaser. Happy tossing! Perfecting Delicious Traditional Caesar Dressing Recipe for Perfect Salads Cooking Process Start by blending the garlic, celery, onion, pepper, salt, anchovies, sugar, mustard, lemon juice, and eggs together until smooth. Then, gradually incorporate the vegetable oil while blending to achieve the desired consistency. Add Your Touch to Delicious Traditional Caesar Dressing Recipe for Perfect Salads Feel free to customize the dressing with ingredients like capers for extra zest, or swap out the anchovies for a vegetarian option—trust me, no judgment here! Storing & Reheating Delicious Traditional Caesar Dressing Recipe for Perfect Salads Store your delicious dressing in an airtight container in the fridge for up to a week. Give it a good shake before using, as separation can occur. No reheating required; just enjoy it chilled. The first time I made this Caesar dressing, my friends devoured it in minutes, and one of them even asked if I was planning to bottle it up and sell it! FAQs About Delicious Traditional Caesar Dressing Recipe for Perfect Salads What is Delicious Traditional Caesar Dressing Recipe for Perfect Salads? Delicious Traditional Caesar Dressing Recipe for Perfect Salads is a flavorful dressing that elevates any salad into a gourmet experience. It combines garlic, anchovies, mustard, lemon juice, and eggs for a creamy and tangy flavor. Perfect for drizzling over crisp romaine lettuce, it adds depth and character to your favorite salads. This homemade version brings restaurant-quality taste right into your kitchen, ensuring that you’ll impress your family and guests alike. Can I make the Delicious Traditional Caesar Dressing Recipe for Perfect Salads without anchovies? Absolutely! If you prefer to keep things vegetarian or simply don’t have anchovies on hand, you can replace them with capers or a bit of miso for that unique umami flavor. Although this traditional dressing relies on anchovies for its signature depth, these