
How to Caramelize Onions for Perfectly Sweet Flavor Every Time
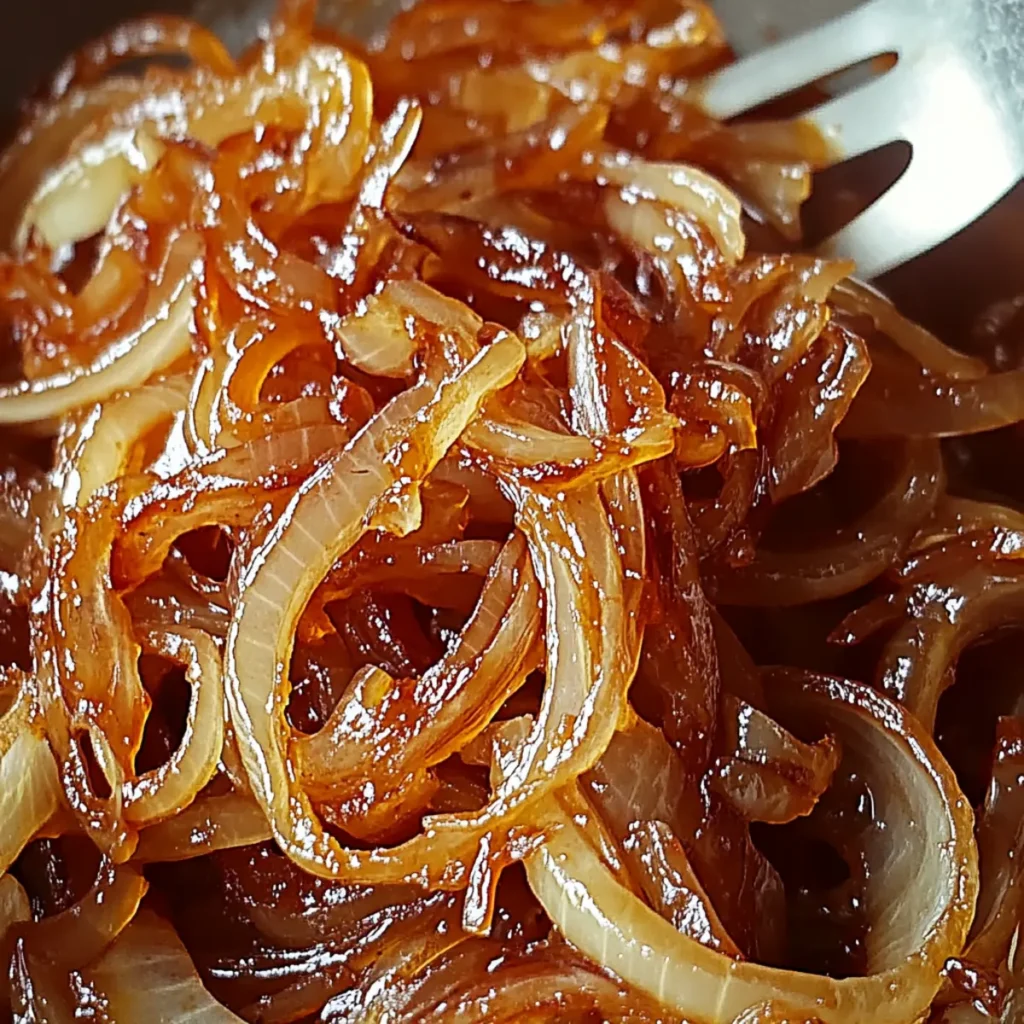
The heavenly aroma of sweet, caramelized onions wafts through your kitchen, teasing your taste buds and transporting you to the flavor-packed world of culinary delights. Learning how to caramelize onions transforms simple ingredients into rich, golden jewels of flavor that can elevate any dish from ordinary to extraordinary. If you’ve ever dreamt of the perfect topping for your burgers, the most delectable addition to your savory galette, or simply want to savor those sweet morsels on their own, mastering how to caramelize onions is a must. Prepare for a fun, flavor-filled journey that not only brings out your inner chef but also makes your taste buds dance with joy. Ingredients for How to Caramelize Onions Here’s what you’ll need to make this delicious How to Caramelize Onions: 3 medium yellow onions (about 450g) – Choose firm onions that feel heavy for their size; they should have smooth, unblemished skin for the best sweetness. 2 tbsp olive oil or butter – Use olive oil for a fruity taste or butter for rich creaminess; both bring their own delightful flavor profiles. 1 tsp salt – This helps draw out the moisture from the onions, promoting that golden-brown color you’re after. 1 tsp sugar (optional) – A pinch of sugar can boost the sweetness; use it if you’re looking for that extra caramelized kick. How to Make How to Caramelize Onions Follow these simple steps to prepare this delicious How to Caramelize Onions: Step 1: Prepare the Onions Start by peeling and thinly slicing the onions. You want each slice to be roughly even in thickness for uniform cooking. Aim for about a quarter-inch thickness for the best results. Your trusty chef’s knife will be your best friend here (and if you happen to shed a few tears, that’s just the onions’ way of saying, “I love you”). Step 2: Sauté in Oil or Butter Heat olive oil or butter in a large, heavy skillet over medium heat. Once it’s sizzling, add the sliced onions along with the salt. Stir them around to ensure that they’re well-coated. Feel free to turn up the heat a notch if you want to start the caramelization process quicker, but keep a close eye to prevent burning. Step 3: Stir and Wait Now comes the fun part—patiently cooking! You’ll want to let those onions cook for about 30-40 minutes, stirring occasionally. You’re looking for that glorious transformation from vivid white to deep golden brown. This will not only deepen the flavor but also help develop a natural sweetness that’s simply irresistible. Step 4: Optional Sugar Application If you have a sweet tooth or are aiming for that ultra-sweet profile, sprinkle a teaspoon of sugar over the onions halfway through cooking. This step is optional but can enhance the caramelization experience, making those onions even more delectable than they already are. Step 5: Finish and Serve Once the onions are beautifully golden and soft, taste and adjust the seasoning if needed. You can serve them immediately as a savory topping for anything from burgers to pizzas, or cool and store them in an airtight container for future meals. They keep wonderfully in the fridge for about a week, just waiting to elevate your dining experience. Now, go on, take a moment to admire those gorgeous, glistening onions. They’re not just ingredients; they’re the promise of flavors yet to come, an explosion of savory sweetness ready to envelop your next meal. Whether you’re hosting a fancy dinner or simply indulging in a cozy evening in, caramelized onions are your secret weapon. This showstopping How to Caramelize Onions delivers restaurant-quality results using simple ingredients you probably already have at home. The perfect balance of textures and flavors creates an unforgettable dining experience that will have everyone asking for seconds. Picture-perfect presentation with vibrant colors makes this dish absolutely Instagram-worthy and guaranteed to impress any dinner guest. Incredibly versatile recipe that works beautifully for weeknight dinners, meal prep, special occasions, or even outdoor entertaining sessions. Perfecting How to Caramelize Onions Cooking Process To achieve the best results in caramelizing onions, start by slicing all your onions first. Heat the oil in your skillet, then add the onions and salt. Stir them occasionally as they cook slowly over medium-low heat. This sequence ensures even caramelization for the perfect sweet flavor. Add Your Touch to How to Caramelize Onions Feel free to add your personal twist when learning how to caramelize onions. Consider using different types of onions, like red or sweet onions, for varying flavors. You can also introduce elements like balsamic vinegar, herbs such as thyme, or even a splash of wine for an extra layer of richness. Storing & Reheating How to Caramelize Onions To store your caramelized onions, place them in an airtight container in the fridge. They’ll keep for about a week. When reheating, gently warm them in a skillet over low heat to prevent burning, or microwave them briefly. When I first tried to caramelize onions, I burned my first batch to a crisp. However, my sister tasted them and laughed, saying they were “deliciously charred.” That became a family joke, and it pushed me to perfect my technique. FAQs About How to Caramelize Onions What is How to Caramelize Onions? Caramelizing onions is a cooking technique that transforms the sharp, pungent flavor of raw onions into a deep, rich sweetness. This magic happens through slow cooking, allowing natural sugars to release and caramelize, resulting in soft, golden-brown onions. Usually, yellow onions are preferred, but you can experiment with red or sweet varieties for different interpretations. The process typically takes around 30 to 40 minutes, but the flavor payoff is phenomenal, making these delicious onions a versatile addition to countless dishes. How long does it take to caramelize onions? Caramelizing onions generally takes between 30 and 40 minutes. This time allows the onions to cook slowly over medium-low heat, enabling their sugars to develop and turn into that lovely golden-brown hue we all adore. While the
Easy SUPER BOWL Hot Wings Recipe for Crispy Game Day Fun

If you’re looking to impress your friends during the big game, nothing beats a plate of SUPER BOWL Hot Wings. Imagine biting into tender, juicy wings coated in a spicy, buttery sauce that makes your taste buds do a happy dance. It’s the kind of flavor explosion that keeps everyone coming back for more, making these wings the star of your game-day spread. As the aroma wafts through your home and the crispy wings come out of the oven, you’ll be transported back to your favorite tailgate memories. Whether you’re gathering with friends, hosting a big party, or just enjoying a cozy night in, these SUPER BOWL Hot Wings will make any occasion unforgettable. Get ready for a flavor-packed experience that you and your guests will savor! Ingredients for SUPER BOWL Hot Wings Here’s what you’ll need to make this delicious SUPER BOWL Hot Wings: 2 lbs chicken wings – Choose fresh or frozen wings; if using frozen, ensure they are thawed properly before cooking. 2 tbsp olive oil – Helps crisp the wings in the oven; feel free to substitute with another oil like avocado or canola oil. 1 tsp salt – Balances the flavors and enhances the overall taste of the wings. 1/2 tsp black pepper – Adds a subtle kick; adjust to your heat preference. 1/2 cup hot sauce – The star ingredient; choose your favorite brand for the right level of heat. 4 tbsp unsalted butter – Makes the sauce rich and luscious; you can substitute with margarine if necessary. 1 tsp garlic powder – Adds depth and flavor to the sauce; fresh garlic could be used for an extra punch. How to Make SUPER BOWL Hot Wings Follow these simple steps to prepare this delicious SUPER BOWL Hot Wings: Step 1: Preheat Your Oven Start by preheating your oven to 400°F (200°C). This is crucial for getting those wings nice and crispy. While it’s heating, you can prep your wings. Step 2: Prepare the Wings In a large bowl, toss the chicken wings with olive oil, salt, and black pepper. Make sure every wing is coated evenly; this will give them a crispy outer layer while they bake. Step 3: Bake the Wings Place the seasoned wings on a baking sheet lined with parchment paper. Bake for 40-45 minutes, flipping halfway through. You want them to be golden brown and crispy for maximum crunch. Step 4: Make the Sauce While the wings are baking, grab a saucepan and melt the butter over medium heat. Stir in the hot sauce and garlic powder until well combined. Keep it on low heat so the flavors can meld together. Step 5: Toss the Wings in Sauce Once the wings are fully cooked and looking delicious, take them out of the oven. Toss them immediately in the prepared sauce. It’s crucial to do this while they’re hot for the sauce to cling well. Step 6: Serve and Enjoy Transfer your wings to a platter, and don’t forget to add some celery sticks and a side of ranch dressing for dipping. Sit back and watch your friends devour them in minutes! These SUPER BOWL Hot Wings are not just a meal; they’re an experience that combines flavor, fun, and a splash of nostalgia. Whip them up and watch as they become the highlight of your Super Bowl party! Enjoy the game and the deliciousness that comes with every crispy bite! Perfecting SUPER BOWL Hot Wings Cooking Process To achieve crispy skin on your wings, start by tossing them in olive oil, salt, and pepper before baking. While they cook, prepare the sauce to ensure everything comes together seamlessly at the end. Add Your Touch to SUPER BOWL Hot Wings Feel free to switch up the hot sauce for a milder version or experiment with additional spices like smoked paprika or cayenne pepper. You can even add honey for a sweet twist! Storing & Reheating SUPER BOWL Hot Wings Store any leftover wings in an airtight container in the fridge for up to three days. Reheat in the oven at 350°F for crispy goodness, or microwave for a quick fix if needed. Sharing these wings with family during game day has created some of my fondest memories. Their delighted expressions and high-fives after the first bite remind me of why I love cooking. FAQs About SUPER BOWL Hot Wings What is SUPER BOWL Hot Wings? SUPER BOWL Hot Wings are a beloved game-day snack, known for their crispy exterior and spicy, flavorful sauce. Typically made from chicken wings tossed in a zesty mixture of hot sauce and butter, these wings are perfect for sharing with friends and family while watching football. Often served with celery sticks and your favorite dipping sauce, they’re a must-have at any Super Bowl party. Whether you prefer them mild or fiery, these wings can be customized to suit everyone’s taste buds. How can I make SUPER BOWL Hot Wings healthier? To make healthier SUPER BOWL Hot Wings, consider baking or air-frying instead of deep-frying. Use skinless chicken wings or simply trim off excess fat. You can also reduce the amount of butter in the sauce or substitute it with healthier options like olive oil. Additionally, using a hot sauce with less sodium and natural flavors can enhance the taste while keeping calories in check. Pair them with fresh vegetable sticks instead of traditional dips for a lighter touch. How do I achieve crispy SUPER BOWL Hot Wings? For crispy SUPER BOWL Hot Wings, it’s essential to ensure they are properly coated with oil and spices before cooking. Baking them on a wire rack allows hot air to circulate, promoting even cooking and crispiness. Be sure to use high heat and flip the wings halfway through to achieve that golden-brown finish. Another tip: let them rest for a few minutes after baking to allow the skin to crisp up further before tossing them in your sauce. Can I prepare SUPER BOWL Hot Wings in advance? Yes,
Pesto Garlic Butter Soft Pretzel Knots Recipe for Perfect Snacks

The smell of freshly baked bread is a gift that keeps on giving, but when you sprinkle in some aromatic garlic, rich butter, and vibrant pesto, it becomes a culinary experience that dances like a lively two-step on your taste buds. Let’s talk about these Pesto Garlic Butter Soft Pretzel Knots. They bring the comfort of homemade snacks right to your kitchen, delivering cheesiness and soft, chewy goodness in every knot. Whether it’s game day, a cozy movie night at home, or you’re simply looking to impress your friends with your baking prowess, these soft pretzel knots elevate any occasion. Imagine pulling them out of the oven, golden brown and irresistible, with the aroma wrapping around you like a warm hug. You’ll absolutely be the star of your snack game! Ingredients for Pesto Garlic Butter Soft Pretzel Knots Here’s what you’ll need to make this delicious Pesto Garlic Butter Soft Pretzel Knots: 3 cups all-purpose flour – Choose a high-quality flour for a soft and chewy texture; it’s the backbone of your pretzels. 1 packet (2 ¼ tsp) active dry yeast – Fresh yeast is key to achieving that beautifully risen dough, so check the expiration date. 1 cup warm water (110°F) – The temperature is critical; too hot can kill the yeast, while too cold won’t activate it. 1 tsp salt – Enhances the flavor of the dough, making each bite flavorful. 4 tbsp unsalted butter (melted) – Adds richness and a golden sheen; feel free to use olive oil for a more robust flavor if desired. ½ cup basil pesto – Store-bought or homemade, this is where that burst of fresh herb flavor comes from. 1 tsp garlic powder – For a tasty garlicky kick that pairs perfectly with the pesto. Additional salt for sprinkling – A finishing touch to elevate the flavor profile; coarse sea salt is excellent for this. How to Make Pesto Garlic Butter Soft Pretzel Knots Follow these simple steps to prepare this delicious Pesto Garlic Butter Soft Pretzel Knots: Step 1: Activate the Yeast In a bowl, combine the warm water and yeast, stirring gently. Let it sit for about 5 minutes until it becomes frothy – like a bubbly caffeinated beverage but much tastier! Step 2: Create the Dough Mix in the flour and salt until everything comes together to form a dough. Your kitchen should start smelling heavenly at this point; if it doesn’t, check to see if your nose is working! Step 3: Knead the Dough Place the dough on a lightly floured surface and knead for about 5 minutes until it’s smooth and elastic. It should feel like a pliable pillow when you’re done. Step 4: Let it Rise Put the dough in an oiled bowl, cover it with a clean dish towel, and let it rise in a warm place until doubled in size, approximately 1 hour. Think of this time as a warm-up for the dough before the main event. Step 5: Shape the Knots Once the dough has risen, divide it into about 12 equal pieces. Roll each piece into a long rope – about 10-12 inches – then tie them into cute little knots. Don’t worry about perfection, they’re all going to be delicious! Step 6: Blanch Separately Boil a pot of water and add a generous tablespoon of baking soda. Carefully drop in the pretzel knots, one at a time, for about 30 seconds to blench. This step is crucial; it gives the knots that iconic pretzel flavor. After this dip, transfer them to a baking sheet. Step 7: Brush and Bake Mix the melted butter with garlic powder and brush it over each knot before sprinkling with coarse salt. Bake at 425°F until golden brown, roughly 15 minutes. Your house will smell like a little Italian bakery, and trust me, it’s hard to resist the temptation to sneak one while they’re cooling. Transfer to a serving platter and get ready for the compliments because these Pesto Garlic Butter Soft Pretzel Knots are going to steal the show! They pair wonderfully with marinara sauce or indulge purely on their own. Just remember, the best part of baking is sharing, so don’t forget to invite friends or family – or not, you might want to hide these for yourself! Perfecting Pesto Garlic Butter Soft Pretzel Knots Cooking Process Start by activating the yeast in warm water while you gather the rest of the ingredients. Knead the dough while it rises, ensuring a smooth experience. After boiling the knots, brush them with garlic butter and bake until golden bliss is achieved. Add Your Touch to Pesto Garlic Butter Soft Pretzel Knots Feel free to swap out the basil pesto for sun-dried tomato pesto for a tangy twist. You can also sprinkle some grated parmesan cheese over the butter before baking for an elevated flavor profile. Adding red pepper flakes can spice things up delightfully! Storing & Reheating Pesto Garlic Butter Soft Pretzel Knots Store any leftover knots in an airtight container for up to three days at room temperature. To reheat, pop them back in a preheated oven at 350°F for about five to seven minutes to restore their softness and warmth. Using pesto garlic butter soft pretzel knots has always been a winner in my house. One family gathering, I made them to share, but they disappeared so fast that I barely got to enjoy any myself! FAQs About Pesto Garlic Butter Soft Pretzel Knots What is Pesto Garlic Butter Soft Pretzel Knots? Pesto Garlic Butter Soft Pretzel Knots are delicious, chewy pretzel bites infused with aromatic garlic and the vibrant flavors of basil pesto. Made from a simple dough enriched with butter and seasoned with garlic, these knots are boiled and baked to perfection. They strike a perfect balance between soft and slightly crispy, making them an irresistible snack or appetizer. This recipe is easy to follow and allows you to enjoy a gourmet treat right from your own kitchen. They are perfect
Easy Mexican-Inspired Street Corn Dip with Fresh or Frozen Corn
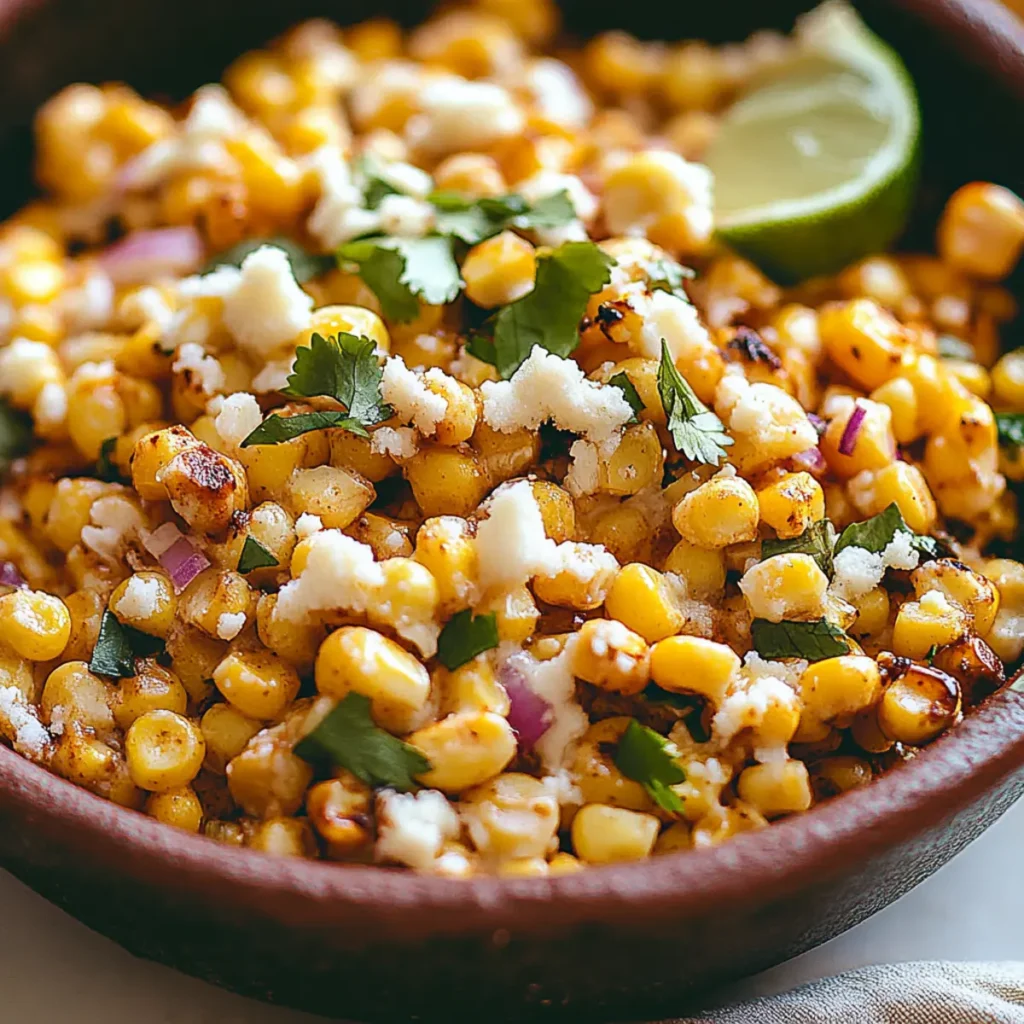
The aroma of warm, cheesy goodness wafts through the air, teasing your taste buds and promising a flavorful explosion. Mexican-Inspired Street Corn Dip (Fresh or Frozen Corn) is the vibrant, party-ready dish you’ll want to create over and over, elevating gatherings from ordinary to unforgettable. Imagine scooping that creamy, zesty concoction with crisp tortilla chips, each bite bursting with the essence of summer barbecues. This dip isn’t just food; it’s an experience to be shared, whether by a roaring fire in the backyard or at a vibrant potluck where laughter echoes and stories are exchanged. Ingredients for Mexican-Inspired Street Corn Dip (Fresh or Frozen Corn) Here’s what you’ll need to make this delicious Mexican-Inspired Street Corn Dip (Fresh or Frozen Corn): 2 cups fresh or frozen corn – If using frozen, be sure to thaw it for the best texture; fresh corn can be cut directly from the cob for optimal flavor. 8 oz cream cheese – Softened to room temperature, this forms the creamy base that brings everything together. 1 cup sour cream – Adds a nice tartness and enhances the dip’s rich mouthfeel. 1/2 cup mayonnaise – For extra creaminess and a hint of sweetness that balances the flavors beautifully. 1/4 cup lime juice – Freshly squeezed is best; it adds brightness and zing that elevates the dip. 1 tsp chili powder – This gives the dip its signature kick; feel free to adjust based on your heat tolerance! 1/4 cup cilantro – Chopped fresh cilantro provides a refreshing herbaceous note to each scoop. 1 cup cheddar cheese – Grated sharp cheddar melts perfectly, bringing that ooey-gooey goodness everyone loves. How to Make Mexican-Inspired Street Corn Dip (Fresh or Frozen Corn) Follow these simple steps to prepare this delicious Mexican-Inspired Street Corn Dip (Fresh or Frozen Corn): Step 1: Preheat the Oven Preheat your oven to 350°F (175°C). This will ensure your dip bakes evenly and becomes beautifully bubbly. Step 2: Creamy Base Preparation In a large bowl, combine the softened cream cheese, sour cream, and mayonnaise. Whip it together until smooth and creamy, as if you’re making a cloud of deliciousness. Step 3: Adding Flavor Next, pour in the lime juice and sprinkle in the chili powder. Mix well until everything is thoroughly combined and the tangy flavors start to emerge. Step 4: Mixing in the Stars Now, gently fold in the corn, chopped cilantro, and grated cheddar cheese. Ensure they are evenly distributed in the creamy base, creating an enticing mosaic of colors and textures. Step 5: Transfer to Baking Dish Carefully transfer your mixture into a baking dish, spreading it evenly. This will ensure every corner gets equally deliciously crispy during baking. Step 6: Bake and Serve Bake for 20-25 minutes in your preheated oven, until the dip is bubbly and the top turns a glorious golden brown. Allow it to cool slightly before serving with your favorite tortilla chips, and watch it disappear! Pair this dish with a simple margarita, and you’re all set for an unforgettable snack! Enjoy every warm, cheesy, and zesty bite of your delicious Mexican-Inspired Street Corn Dip! Plus, don’t forget to share the love (or keep it all to yourself, no judgment here). This showstopping Mexican-Inspired Street Corn Dip (Fresh or Frozen Corn) delivers restaurant-quality results using simple ingredients you probably already have at home. The perfect balance of textures and flavors creates an unforgettable dining experience that will have everyone asking for seconds. Picture-perfect presentation with vibrant colors makes this dish absolutely Instagram-worthy and guaranteed to impress any dinner guest. Incredibly versatile recipe that works beautifully for weeknight dinners, meal prep, special occasions, or even outdoor entertaining sessions. Perfecting Mexican-Inspired Street Corn Dip (Fresh or Frozen Corn) Cooking Process Start by mixing your creamy base of cream cheese, sour cream, and mayonnaise until smooth. While that’s happening, preheat your oven to 350°F (175°C) so it’s perfectly ready for your dip’s final, bubbly transformation. Add Your Touch to Mexican-Inspired Street Corn Dip (Fresh or Frozen Corn) Feel free to customize this dip according to your taste buds. Swap the cheddar cheese for pepper jack if you’re in the mood for a spicy kick, or add diced jalapeños for an extra layer of flavor. Storing & Reheating Mexican-Inspired Street Corn Dip (Fresh or Frozen Corn) To store your dip, cover it tightly with plastic wrap and refrigerate for up to three days. When it’s time to enjoy again, simply reheat it in the oven or microwave until warmed through. There was that one barbecue where I brought this dip, and it was such a hit that I found myself awkwardly defending a half-empty dish from greedy friends, who wanted to scoop the last bites straight out of the dish. What a delicious problem to have! FAQs About Mexican-Inspired Street Corn Dip (Fresh or Frozen Corn) What is Mexican-Inspired Street Corn Dip (Fresh or Frozen Corn)? Mexican-Inspired Street Corn Dip is a creamy, flavorful dish that draws inspiration from traditional elote, or Mexican street corn. This dip combines corn, cream cheese, sour cream, and savory spices like chili powder, all baked to bubbly perfection. You can use either fresh or frozen corn for this recipe, making it versatile and accessible for any occasion. It’s perfect for serving with tortilla chips at parties, barbecues, or casual family dinners. This dip captures that sweet yet tangy flavor profile you love about street corn but in a convenient, shareable format. How do I customize my Mexican-Inspired Street Corn Dip? Customizing your Mexican-Inspired Street Corn Dip is incredibly easy! If you want to spice things up, consider swapping cheddar cheese for pepper jack or adding diced jalapeños for a kick. You can also enhance the flavor by incorporating diced red onions or using smoked paprika instead of chili powder. For those who prefer a milder taste, omit the spicy elements and let the sweetness of the corn shine through. With so many options, you can tailor the dip to perfectly match your palate. Can
Delicious Dill Pickle Dip Recipe for Quick Appetizer Delight
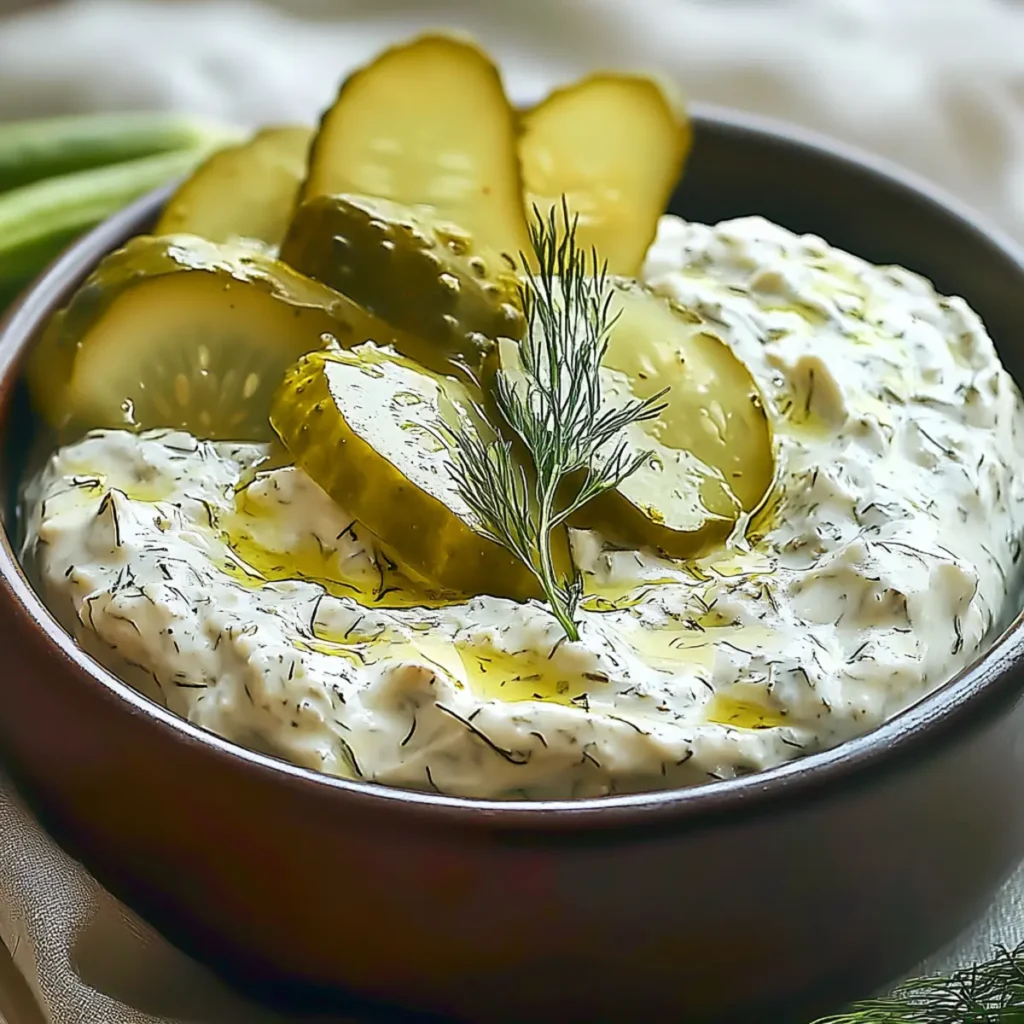
You won’t believe how creamy and tangy this Dill Pickle Dip is! Imagine diving into a bowl of rich, creamy goodness that dances between salty and tart—every bite sending taste buds into a joyful frenzy. Served cold, this dip is a guaranteed crowd-pleaser, wonderful for parties or simply snacking away during a binge-watching session on the couch. Ties to childhood memories often lie in seemingly simple dishes, and this Dill Pickle Dip is no exception. Growing up, I remember visiting my aunt’s house, where she always had a bowl of this dip at family gatherings. The combination of dill pickles and cream cheese brought back cozy memories and laughter, urging me to dip everything in sight—from chips and veggies to buttered bread. Let me assure you, whether for game day, a lazy weekend, or any occasion that calls for some finger-licking fun, this dip will surely find a place on your table and in your heart! Ingredients for Dill Pickle Dip Here’s what you’ll need to make this delicious Dill Pickle Dip: 8 oz cream cheese – Make sure it’s softened to create a smooth base for your dip, as cold cream cheese will be harder to mix. 1/2 cup sour cream – This adds a tangy taste and creaminess that balances the flavors beautifully. 1 cup dill pickles – Finely chopped dill pickles give the dip its signature crunch and zing, so go for some good-quality ones. 1 tbsp dill weed – Fresh or dried, it enhances the dill flavor, creating that classic taste we all know and love. 1 tsp garlic powder – Adds a bit of depth to the flavor profile, making the dip even more addictive. Salt and pepper to taste – Just a pinch of each will help balance the flavors perfectly. How to Make Dill Pickle Dip Follow these simple steps to prepare this delicious Dill Pickle Dip: Step 1: Gather All Your Ingredients Start by organizing all your ingredients on a clean countertop. That way, you’ll have everything ready to go when you’re ready to dive into mixing! Step 2: Mix the Creamy Base In a large mixing bowl, add the softened cream cheese and sour cream. Grab an electric mixer or a sturdy spatula and mix until the mixture is completely smooth and creamy—like the clouds on a sunny day. Step 3: Incorporate the Pickles Now, it’s time to fold in the finely chopped dill pickles and dill weed into the creamy mixture. Be gentle! You want to maintain that delicious crunch from the pickles while ensuring even distribution. Step 4: Season to Perfection Taste your dip and add garlic powder, salt, and pepper accordingly. Everyone has different preferences, so feel free to adjust the seasoning until it’s just right for you. Step 5: Chill to Enhance the Flavors Cover the bowl with plastic wrap or a lid, and pop it into the refrigerator. Allow it to chill for at least one hour, giving the flavors time to meld together as if they were at a delightful party of their own. Step 6: Serve and Enjoy! When you’re ready to serve your Dill Pickle Dip, take it out of the fridge and pair it with your favorite dippers—think crunchy veggies, potato chips, or even crackers. Gather your friends and family, and let the dipping commence! This Dill Pickle Dip is not just another appetizer; it’s a flavorful journey that brings a piece of my childhood and an explosion of flavors to your table. Enjoy! This showstopping Dill Pickle Dip delivers restaurant-quality results using simple ingredients you probably already have at home. The perfect balance of textures and flavors creates an unforgettable dining experience that will have everyone asking for seconds. Picture-perfect presentation with vibrant colors makes this dish absolutely Instagram-worthy and guaranteed to impress any dinner guest. Incredibly versatile recipe that works beautifully for weeknight dinners, meal prep, special occasions, or even outdoor entertaining sessions. Perfecting Dill Pickle Dip Cooking Process For the best results, begin by combining the softened cream cheese and sour cream until smooth. This ensures a creamy base before folding in the dill pickles and seasonings. Add Your Touch to Dill Pickle Dip Feel free to modify the recipe by adding extra spices like cayenne for a kick or using Greek yogurt instead of sour cream for a healthier alternative. Storing & Reheating Dill Pickle Dip To maintain its fresh flavors, store Dill Pickle Dip in an airtight container in your refrigerator for up to five days. It’s best served cold, so no reheating is necessary. It was the summer barbecue last year when my friends devoured this dip like it was the last slice of pizza at a party. Everyone begged for the recipe, and moments like this remind me why I love sharing food. FAQs About Dill Pickle Dip What is Dill Pickle Dip? Dill Pickle Dip is a creamy and tangy appetizer that combines softened cream cheese and sour cream with finely chopped dill pickles, dill weed, and garlic powder. This delicious dip creates a flavor explosion that’s perfect for gatherings, game days, or casual snacking. The combination of creamy texture and the crunch of pickles makes it an irresistible treat. Serve it chilled with your favorite dippers, and you’ll have everyone coming back for more. How do you make Dill Pickle Dip your own? You can easily customize your Dill Pickle Dip to suit your taste preferences. Try adding a splash of hot sauce for some heat, or incorporate diced onions for an added crunch. For a healthier twist, substitute Greek yogurt for sour cream. Experiment with different herbs like chives or parsley to elevate the flavors. The great thing about this dip is its versatility—feel free to get creative and make it uniquely yours! How long does Dill Pickle Dip last in the fridge? When stored properly in an airtight container, Dill Pickle Dip can last for up to five days in the refrigerator. To maintain its delicious taste and creamy texture,
Irresistible Sloppy Hot Italian Cheese Dip Recipe for Game Day

There’s something mesmerizing about the aroma of melted cheese, savory Italian sausage, and rich marinara blending into a gooey dip that has you daydreaming of game day gatherings, cozy movie nights, or just indulging on a quiet Tuesday evening. The Sloppy Hot Italian Cheese Dip isn’t just another appetizer; it’s a hearty embrace of flavor that practically begs to be served with crispy chips or crusty breadsticks. Imagine the golden cheese bubbling away in a baking dish, its tantalizing smell wafting through your kitchen. As it bakes, the anticipation builds, taking you back to fond memories of friends laughing around a table, or family game nights where the best moments are punctuated by delicious bites of comfort food. So grab your favorite dipping tool and settle in—it’s time to create an irresistible Sloppy Hot Italian Cheese Dip that no one can resist. Ingredients for Sloppy Hot Italian Cheese Dip Here’s what you’ll need to make this delicious Sloppy Hot Italian Cheese Dip: 1 pound Italian sausage – Choose mild or spicy based on your preference, and look for ground sausage to easily crumble while cooking. 8 oz cream cheese – This adds creaminess and richness; make sure it’s softened for easy mixing. 2 cups shredded mozzarella cheese – Opt for fresh mozzarella for a gooey texture or pre-shredded for convenience. 1 cup jarred marinara sauce – A quality jar will elevate the flavors; choose your favorite brand for the best taste. 1/4 cup fresh basil – Adds refreshing herbal notes; chop it finely to incorporate it evenly throughout the dip. How to Make Sloppy Hot Italian Cheese Dip Follow these simple steps to prepare this delicious Sloppy Hot Italian Cheese Dip: Step 1: Brown the Sausage In a large skillet over medium heat, cook the Italian sausage until it’s browned and crumbles beautifully, about 5 to 7 minutes. Make sure to drain any excess grease so your dip won’t become a greasy mess. Step 2: Mix the Cheesy Goodness In a bowl, blend the softened cream cheese with the marinara sauce until you achieve a smooth and creamy mixture. This cheesy mixture should be a sunset-hued dream that’s ready to be combined with the sausage. Step 3: Combine Ingredients Stir in the cooked sausage and half of the shredded mozzarella cheese until everything is well combined. This is where the magic happens and transforms simple ingredients into a mouthwatering ensemble. Step 4: Prepare for Baking Preheat your oven to 350°F (175°C). Transfer your luscious mixture into a greased baking dish to give it a warm home while it bakes. Top it off with the remaining mozzarella cheese, because more cheese is always a good idea. Step 5: Bake to Perfection Slide the baking dish into your preheated oven and let it bake for about 20 to 25 minutes until you see a golden, bubbly top that makes your heart skip a beat. Step 6: Garnish and Serve Once it’s out of the oven and slightly cooled, garnish the dip with fresh basil for that pop of color and flavor. Serve hot with a side of crunchy chips, fluffy breadsticks, or colorful veggie sticks for dipping. Now, here’s the kicker: everyone loves a cheesy dip, and no one has ever turned down that offer. Whether it’s a big game day, a cozy movie night with friends, or just a treat yourself kind of night, this Sloppy Hot Italian Cheese Dip is bound to steal the show and draw everyone to the table. Just remember to keep your napkins handy; things could get a little messy—and messy food always tastes the best! Perfecting Sloppy Hot Italian Cheese Dip Cooking Process To maximize efficiency and flavor, start by browning the Italian sausage, draining excess grease before mixing it with cream cheese and marinara sauce. Bake the mixture topped with mozzarella for a bubbly, golden finish. Add Your Touch to Sloppy Hot Italian Cheese Dip Feel free to swap the Italian sausage for ground turkey or chicken for a lighter option. Add some diced bell peppers for extra crunch, or sprinkle in your favorite spices to customize the flavor profile. Storing & Reheating Sloppy Hot Italian Cheese Dip Store any leftovers in an airtight container in the fridge for up to three days. To reheat, simply pop it back in the oven until warm, or use the microwave in short intervals, stirring frequently. Sharing this dish with friends always gets amusing reactions, particularly when they see how quickly it disappears. It became a must-have at our game nights, with friends clamoring for the recipe after the first glorious bite. FAQs About Sloppy Hot Italian Cheese Dip What is Sloppy Hot Italian Cheese Dip? Sloppy Hot Italian Cheese Dip is a creamy, savory appetizer loaded with Italian sausage, cream cheese, marinara, and gooey mozzarella. It’s baked to perfection, creating a warm and bubbly dip that’s perfect for game day, parties, or cozy nights in. The blend of rich flavors and textures makes it irresistible, ensuring that it’s a crowd-pleaser at any gathering. Serve it alongside chips, breadsticks, or fresh veggies for dipping. How do I customize my Sloppy Hot Italian Cheese Dip? You can easily customize your Sloppy Hot Italian Cheese Dip by swapping Italian sausage for ground turkey or chicken for a lighter version. Add diced bell peppers or jalapeños for extra crunch and spice. Experiment with different cheeses like provolone or gouda to bring new flavors. You can even sneak in some chopped spinach for a healthy twist, making it a perfect dish that caters to everyone’s taste buds. Can I make Sloppy Hot Italian Cheese Dip ahead of time? Yes, you can prepare your Sloppy Hot Italian Cheese Dip ahead of time. Mix all the ingredients and transfer them to your baking dish, then cover and refrigerate until you’re ready to bake. When it’s time to serve, simply pop it in the oven directly from the fridge, adding a few extra minutes to the baking time if needed. This way, you
Delicious Pepperoni Pizza Bites Ready in 35 Minutes

When your cravings hit, nothing quite satisfies like homemade Pepperoni Pizza Bites. Imagine crispy, golden pockets bursting with gooey mozzarella cheese, spicy pepperoni, and a sprinkle of Italian herbs. The aroma wafts through the air, enveloping your kitchen in a mouthwatering embrace that promises warmth and joy. These little bites are the perfect solution for those evenings when you want something comforting but don’t want to spend hours in the kitchen. Growing up, pizza night was always a cherished event in our household. The sight of bubbling cheese and vibrant toppings laid over a delicious crust was enough to make anyone’s stomach rumble with anticipation. Fast forward to today, and these Pepperoni Pizza Bites reignite that same excitement and warmth. They’re perfect for game days, movie nights, or just because you deserve a little indulgence in your life. Trust me, your taste buds will thank you. Ingredients for Pepperoni Pizza Bites Here’s what you’ll need to make this delicious Pepperoni Pizza Bites: 1 lb pizza dough – Choose fresh dough for the best texture; store-bought works well too in a pinch. 4 oz pepperoni slices – This classic topping adds that signature flavor; try turkey pepperoni for a lighter option. 1 cup shredded mozzarella cheese – Fresh shredded cheese melts beautifully and adds a creamy center. 1 tsp Italian seasoning – A blend of dried herbs enhances the flavor profile; feel free to adjust to your taste. ½ cup marinara sauce – Perfect for dipping; add extra herbs for a homemade touch. How to Make Pepperoni Pizza Bites Follow these simple steps to prepare this delicious Pepperoni Pizza Bites: Step 1: Preheat the Oven Preheat your oven to 400°F (200°C) to ensure those delightful bites will bake evenly. Step 2: Roll Out the Dough On a floured surface, roll out the pizza dough until it’s about ¼ inch thick. This thinness will give you that perfect crispy texture. Step 3: Cut the Dough Using a pizza cutter or a knife, slice the dough into 2×2 inch squares. Keep it steady—no one likes a jagged bite! Step 4: Fill the Squares Place one slice of pepperoni and a generous sprinkle of mozzarella cheese in the center of each square. The more cheese, the better! Step 5: Seal the Bites Fold the corners of each square toward the center and pinch tightly to seal the filling within. Think of it as giving them a nice little hug! Step 6: Bake to Perfection Arrange your sealed bites on a greased baking sheet. Bake for 15-20 minutes until they’re golden brown and irresistibly inviting. Transfer to a serving platter and enjoy while warm with a side of marinara sauce for that perfect finishing touch. Your kitchen will smell heavenly, and your taste buds will celebrate with every delicious bite. Imagine gathering around with family or friends, pulling apart these little doughy delights, the cheese stretching like the best memories and laughter you’ve shared. Whether you’re snacking during a binge-watch session or serving them at a party, these Pepperoni Pizza Bites are bound to be the star of the show! So roll up your sleeves, put on your apron, and let’s make some edible magic happen. Perfecting Pepperoni Pizza Bites Cooking Process To create exceptional Pepperoni Pizza Bites, start by preheating your oven while you roll out the dough. Shape and fill the bites, then bake them to golden perfection. These steps will ensure a streamlined cooking experience and perfectly delicious results. Add Your Touch to Pepperoni Pizza Bites Feel free to switch up the pepperoni with your favorite deli meats or veggies for a twist. Experiment with different cheeses like provolone or add a pinch of crushed red pepper for extra heat. Your creativity will shine through! Storing & Reheating Pepperoni Pizza Bites Store leftover Pepperoni Pizza Bites in an airtight container in the refrigerator for up to three days. To reheat, pop them in a 350°F oven for 10 to 15 minutes for that fresh-from-the-oven taste. Sharing these little Pepperoni Pizza Bites with friends at game night turned out to be a huge hit! Their happy faces as they devoured the bites are moments I’ll always cherish. FAQs About Pepperoni Pizza Bites What is Pepperoni Pizza Bites? Pepperoni Pizza Bites are delicious little morsels of joy that bring the essence of pizza in a perfect bite-sized treat. They typically consist of pizza dough filled with pepperoni, mozzarella cheese, and a hint of Italian seasoning, all baked until golden. These savory bites are ideal for snacking, entertaining guests, or enjoying a cozy movie night. They perfectly balance flavor and texture, offering a crunchy exterior with a gooey, cheesy center. Served warm with marinara sauce, they are an irresistible addition to any gathering. How do I make Pepperoni Pizza Bites healthier? If you want to slim down your Pepperoni Pizza Bites, consider swapping regular pizza dough for whole wheat or cauliflower crust for a lighter option. You can also reduce the cheese and substitute turkey or veggie pepperoni for a leaner alternative. Adding vegetables like bell peppers, onions, or mushrooms not only boosts nutrition but also provides extra flavor. Finally, bake instead of frying to cut down on unhealthy fats while keeping that delightful crunch. Can I customize my Pepperoni Pizza Bites? Absolutely! One of the best things about Pepperoni Pizza Bites is their versatility. You can experiment with various fillings such as different meats, assorted cheeses, or even spices like crushed red pepper or garlic powder for an extra kick. For a vegetarian version, try using vegetables like spinach, zucchini, or bell peppers. The options are endless, allowing you to make these bites uniquely yours while still retaining that delicious pizza essence. How should I store Pepperoni Pizza Bites? To keep your leftover Pepperoni Pizza Bites fresh, store them in an airtight container in the fridge for up to three days. If you want to extend their life, consider freezing them. To reheat, simply pop them in the oven at 350°F for 10
Savory Garlic Butter Steak Bites Recipe Ready in 18 Minutes
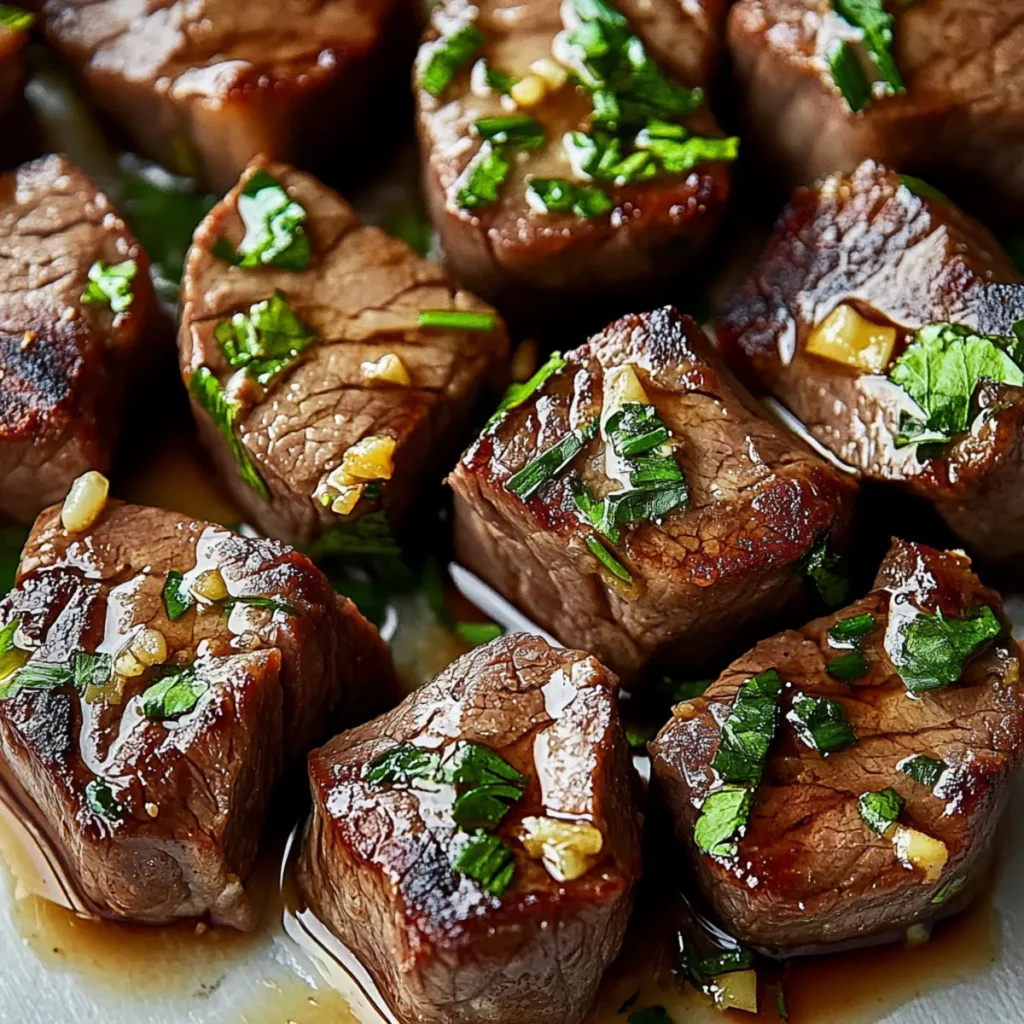
Imagine sinking your teeth into succulent, juicy bites of steak, bathed in a rich, garlicky butter that dances on your palate. Garlic Butter Steak Bites are not just a dish; they’re a full-on flavor symphony that beckons you after a long day or celebrates any occasion, big or small. This delicious concoction is like a warm hug for your taste buds, promising to be the star attraction at dinner. Now, whether you’re wowing guests at a dinner party or indulging in a cozy Friday night in front of the TV, these Garlic Butter Steak Bites are your culinary secret weapon. Picture this: your friends walk in, the aroma of sizzling garlic and butter wafts through the air, and before you know it, they’re already drooling in anticipation. Let’s dive into the magic of this recipe, shall we? Ingredients for Garlic Butter Steak Bites Here’s what you’ll need to make this delicious Garlic Butter Steak Bites: 1 lb sirloin or ribeye steak – Choose high-quality cuts for succulent bites that sear beautifully. Sirloin is a budget-friendly option, while ribeye brings extra marbling and flavor. 4 cloves fresh garlic – Freshly minced garlic is key; it adds a punch of rich flavor that powdered garlic just can’t achieve. 4 tbsp unsalted butter – The creaminess of butter elevates the flavor and keeps each bite juicy and tender. 2 tbsp olive oil – Helps achieve that perfect sear while adding healthy fats to the mix. 1 tsp salt – Essential for amplifying all the flavors and enhancing the steak’s natural taste. 1/2 tsp black pepper – Adds a warm, spicy note that beautifully balances the richness of the butter. 2 tbsp fresh parsley – Chopped for garnish; it adds a burst of color and freshness that’s visually appealing. How to Make Garlic Butter Steak Bites Follow these simple steps to prepare this delicious Garlic Butter Steak Bites: Step 1: Prepare the Steak Start by cutting the steak into 1-inch cubes. It’s important to pat them dry with paper towels to ensure a nice sear later on. Trust me, none of that watery business, please! Step 2: Season the Meat Transfer your beautifully cubed steak into a bowl, and sprinkle it generously with salt and black pepper. Give it a gentle toss to ensure every piece is coated in that tasty goodness. Step 3: Get Your Skillet Ready Heat the olive oil in a large skillet over medium-high heat until it shimmers and looks like it’s ready to party. This is where the magic starts happening! Step 4: Sear the Steak Bites Carefully place the seasoned steak cubes in a single layer in the skillet. Let them sear undisturbed for about 2 minutes until that gorgeous brown crust forms. Flip them over and cook for another minute for even browning—the aroma will be heavenly. Step 5: Add the Flavor Bomb Toss in the minced garlic and butter to the skillet with the steak. Stir everything around until the garlic becomes fragrant and golden, about 1-2 minutes. Get ready for your kitchen to smell like a gourmet restaurant! Step 6: Finish with Parsley and Serve Once the steak bites are coated in that delicious garlic butter, remove from heat and garnish with the chopped fresh parsley. Serve these beauties immediately, and watch them disappear faster than you can say “dinner is served!” So there you have it, folks! Your Garlic Butter Steak Bites are an absolute smash hit, ready to impress at any gathering. Whether you’re hosting friends or enjoying a quiet evening, they always deliver maximum flavor with minimum fuss. These savory bites are not only satisfying to the taste buds but also visually stunning. Picture the golden sheen of butter sliding off each tender chunk, alongside the vibrant green of parsley—pure bliss on a plate! Make sure to get a few pictures before they vanish, because trust me, once your guests get a whiff of that garlic and butter combination, the only thing they’ll be thinking about is diving right in. Enjoy the delightful bites fresh from the skillet or save a few for meal prep—if they even make it that far! Happy cooking! Perfecting Garlic Butter Steak Bites Cooking Process To achieve perfect Garlic Butter Steak Bites, start by searing the steak until browned, then prepare the garlic and butter mixture while the meat cooks. This way, you ensure even flavor distribution and optimal cooking. Add Your Touch to Garlic Butter Steak Bites Feel free to swap the sirloin for a leaner cut like tenderloin, or substitute the butter for ghee or a plant-based alternative for a lighter touch. Experiment with spices like smoked paprika or rosemary to create your signature flavor. Storing & Reheating Garlic Butter Steak Bites To store leftover Garlic Butter Steak Bites, place them in an airtight container and refrigerate for up to three days. When reheating, use a skillet over low heat to preserve their tenderness and prevent drying out. When I first made Garlic Butter Steak Bites for my friends, the laughter and compliments flowed like our drinks. Seeing them devour every last bite made me realize I had finally won the “best dinner” round. FAQs About Garlic Butter Steak Bites What is Garlic Butter Steak Bites? Garlic Butter Steak Bites are delicious morsels of steak, usually prepared using tender cuts like sirloin or ribeye. These bites are seared to perfection in a sizzling buttery garlic sauce, bringing out a rich flavor that pairs wonderfully with fresh herbs. They’re incredibly quick to prepare, making them an ideal option for busy weeknights or entertaining guests. Each bite is a juicy explosion of garlic and buttery goodness that leaves you wanting more. How can I customize my Garlic Butter Steak Bites? Customizing Garlic Butter Steak Bites is easy and fun! You can swap out sirloin for tender cuts like tenderloin or even add a sprinkle of your favorite spices, such as smoked paprika or fresh rosemary. If you’re feeling adventurous, experiment with different types of butter, like
Delicious Hot Spinach Artichoke Dip Recipe for Perfect Parties
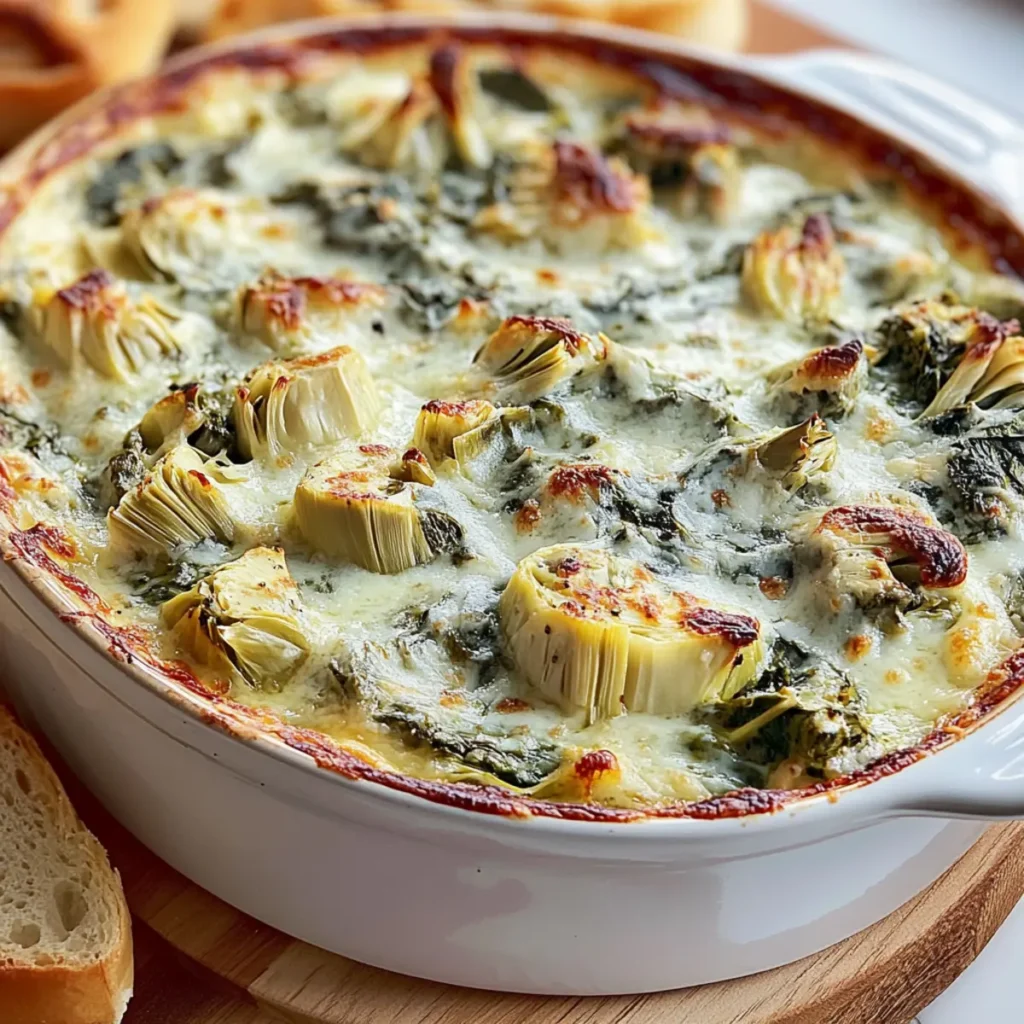
The aroma of warm, cheesy goodness fills the air as you dip your chip into the hot spinach artichoke dip. Creamy, rich, and bursting with flavor, it’s the kind of dish that has the power to turn any gathering into an epic affair, pulling in friends and family as if it’s calling their names. There’s nothing quite like that first bite—a delightful mingling of tender spinach and artichoke hearts, generously enveloped in a cheesy embrace that leaves everyone coming back for more, all while the savory garlic notes tease the taste buds. Think about the last time you craved comfort food—it was likely during a cozy get-together or maybe even just a spontaneous movie night at home. This hot spinach artichoke dip is the answer to those cravings! Whether it’s game day, a birthday bash, or simply a Wednesday evening, this dish guarantees to steal the show and leave your guests raving for days. Trust me; it’s not just a dip. It’s a warm hug in a bowl! Ingredients for Hot Spinach Artichoke Dip Here’s what you’ll need to make this delicious Hot Spinach Artichoke Dip: 2 cups fresh spinach – Tenderly wilted spinach adds a vibrant green color and a boost of nutrients to your dip. 14 oz canned artichoke hearts – Make sure these are drained to maintain the dip’s creamy texture and enhance the unique flavor. 8 oz cream cheese – This is the secret ingredient that gives the dip its luscious, creamy consistency. 1 cup sour cream – This provides a tangy flavor and smooth texture that complements the cream cheese perfectly. ½ cup shredded Parmesan cheese – This adds a sprinkle of nuttiness, while helping create that beautiful golden crust when baked. 1 tsp garlic powder – Garlic is a staple that brings out the flavor in your dip, infusing it with a savory depth. 1 tbsp hot sauce – Add this for a kick of heat that elevates the entire flavor profile; feel free to adjust to your preference! How to Make Hot Spinach Artichoke Dip Follow these simple steps to prepare this delicious Hot Spinach Artichoke Dip: Step 1: Preheat Your Oven Preheat your oven to 350°F (175°C). This ensures our dip bakes evenly and comes out bubbly and delicious. Step 2: Sauté the Spinach In a skillet over medium heat, sauté the fresh spinach for about 2 minutes until it wilts. You want that vibrant green to shine through! Step 3: Combine the Ingredients In a large mixing bowl, lovingly mix together the sautéed spinach, drained artichoke hearts, cream cheese, sour cream, Parmesan cheese, and garlic powder until well combined. Make sure everything is evenly blended to enhance the flavors. Step 4: Add the Hot Sauce Stir in your hot sauce to taste, giving it a good mix. You can adjust the amount based on how fiery you want your dip to be—spice is nice, after all! Step 5: Bake the Dip Transfer the creamy mixture to an oven-safe dish. Slide it into your preheated oven and bake for 25 minutes, or until the top turns golden brown and bubbly. Step 6: Serve and Enjoy Let the dip cool slightly before serving. It’s perfect with crunchy tortilla chips or warm slices of bread. Trust me; it’s love at first bite! And there you have it—a sumptuous hot spinach artichoke dip that’s bound to impress your guests, make your significant other smile, and perhaps even win over your toddler. Just be prepared to keep the chips nearby because everyone will want a taste of that creamy, cheesy goodness! Enjoy! This showstopping Hot Spinach Artichoke Dip delivers restaurant-quality results using simple ingredients you probably already have at home. The perfect balance of textures and flavors creates an unforgettable dining experience that will have everyone asking for seconds. Picture-perfect presentation with vibrant colors makes this dish absolutely Instagram-worthy and guaranteed to impress any dinner guest. Incredibly versatile recipe that works beautifully for weeknight dinners, meal prep, special occasions, or even outdoor entertaining sessions. Perfecting Hot Spinach Artichoke Dip Cooking Process To create the best Hot Spinach Artichoke Dip, start by sautéing the spinach until wilted, allowing the flavors to develop. Next, mix the sautéed spinach and other ingredients before baking to meld the flavors beautifully. Add Your Touch to Hot Spinach Artichoke Dip Feel free to swap out the sour cream for Greek yogurt for a tangy twist or add a pinch of cayenne pepper for some extra heat. Consider experimenting with different cheese blends for unique flavors! Storing & Reheating Hot Spinach Artichoke Dip Store any leftovers in an airtight container in the fridge for up to three days. When reheating, use the oven to restore the dip’s creamy texture. Avoid the microwave if possible, as it can dry out the dip. I vividly remember the first time I made this dish for a gathering. My friends’ faces lit up, and one of them exclaimed it was the best dip they had ever tasted. That moment made all the effort worthwhile! FAQs About Hot Spinach Artichoke Dip What is Hot Spinach Artichoke Dip? Hot Spinach Artichoke Dip is a creamy, savory appetizer made primarily from spinach, artichoke hearts, cream cheese, sour cream, and Parmesan cheese. It’s typically baked until bubbly and golden brown, highlighting the delightful flavors of the ingredients. This dish is beloved for its rich texture and intriguing taste, making it a perfect snack for parties, game nights, or cozy gatherings with friends and family. The combination of fresh spinach and tangy artichokes creates a flavor profile that is both satisfying and addictive. How can I serve Hot Spinach Artichoke Dip? You can serve Hot Spinach Artichoke Dip in a variety of ways to please your guests. A classic option is to pair it with tortilla chips or crispy pita chips, as their crunch complements the creamy dip perfectly. Additionally, you can offer slices of toasted baguette or vegetables like celery and carrots for a healthier crunch. For an elegant touch,
Easy Buffalo Chicken Dip with Franks Buffalo Sauce Recipe
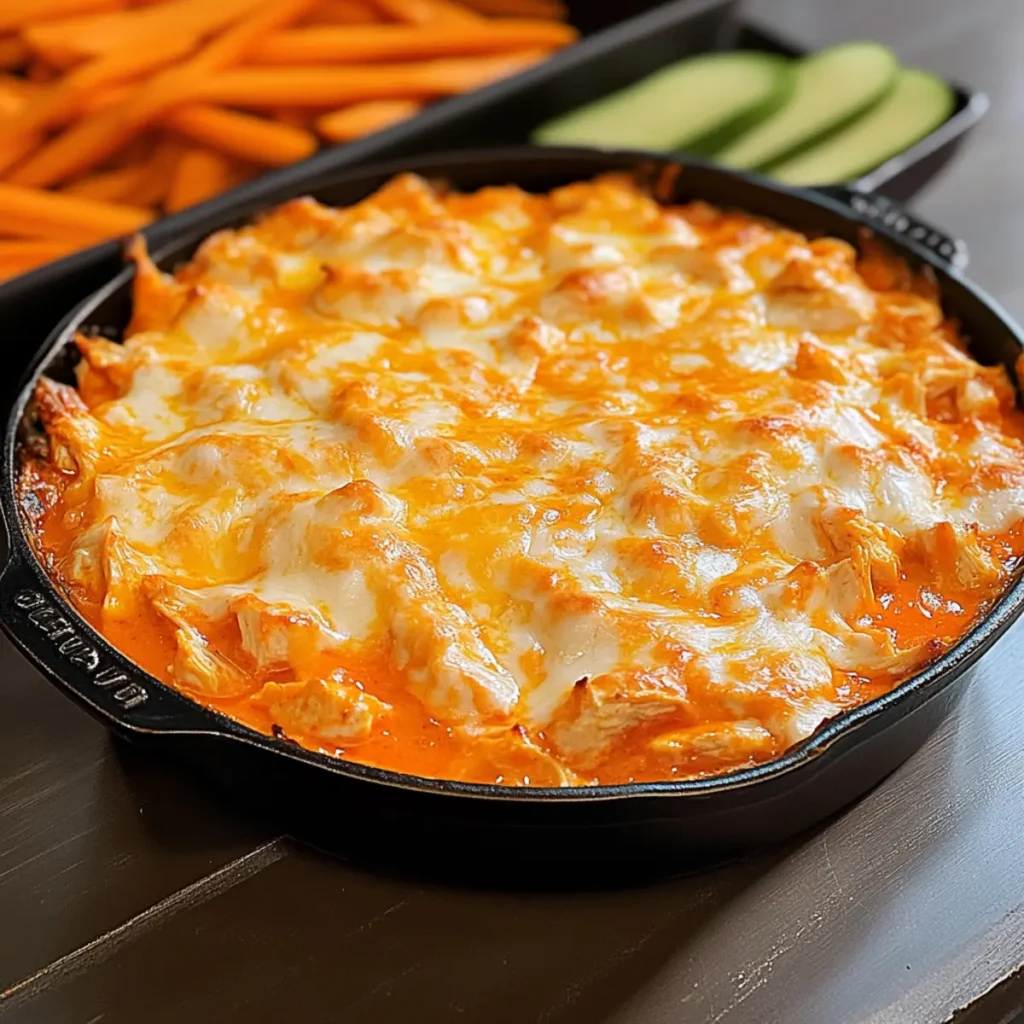
There’s nothing quite like the tantalizing aroma of Buffalo Chicken Dip with Franks Buffalo Sauce wafting through the air, teasing your taste buds and making your mouth water. This creamy, spicy masterpiece is an ultimate crowd-pleaser, whether you’re hosting a game day party, enjoying a cozy movie night, or simply craving a flavorful snack. Imagine a warm, cheesy concoction that delivers a punch of flavor with every bite. Once you’ve tasted this delightful dip, you’ll understand why it deserves a spot at every gathering. As the cheesy goodness mingles with the bold kick of Frank’s, it’s hard not to be transported back to those memorable gatherings where laughter and delicious food unite families and friends. This recipe is more than just a dish; it’s an experience that sparks joy and connection. With every scoop, you’ll relish the anticipation of that perfect blend of flavors, making any occasion extra special. Ingredients for Buffalo Chicken Dip with Franks Buffalo Sauce Here’s what you’ll need to make this delicious Buffalo Chicken Dip with Franks Buffalo Sauce: 3 cups boneless, skinless chicken breasts – Cooked and shredded, this is the heart of the dip, bringing in protein and tenderness. 8 oz cream cheese – Creamy and rich, it provides the perfect base to hold everything together. 1 cup sour cream – Adds a tangy flavor and creamy texture that balances the spice. 1 cup shredded sharp cheddar cheese – For that melty goodness, choose sharp cheddar for a more flavorful punch. 1/2 cup Frank’s RedHot Sauce – The star of the show! It infuses the dip with that beloved spicy kick. 1/4 cup green onions – Fresh and vibrant, they add a pop of color and flavor as a garnish. How to Make Buffalo Chicken Dip with Franks Buffalo Sauce Follow these simple steps to prepare this delicious Buffalo Chicken Dip with Franks Buffalo Sauce: Step 1: Preheat the Oven Start by preheating your oven to 350°F (175°C). This ensures that your dip gets bubbly and golden in the next step. Step 2: Mix the Creamy Base In a large bowl, combine 8 oz of softened cream cheese and 1 cup of sour cream. Blend them together until you achieve a smooth consistency, making sure they are well incorporated. Step 3: Add the Chicken and Hot Sauce Fold in the shredded chicken, 1/2 cup of Frank’s RedHot Sauce, and half of the shredded sharp cheddar cheese. Mix everything together until every piece of chicken is coated with that fiery goodness. Step 4: Transfer to Baking Dish Spoon the delicious mixture into a greased baking dish, spreading it evenly. Then, top it with the remaining cheddar cheese to create that enticing melted layer. Step 5: Bake to Perfection Place the dish in your preheated oven and bake for 20-25 minutes. You’ll know it’s ready when it’s bubbly and the cheese crackles lightly on top. Can you smell it already? Step 6: Garnish and Serve Once out of the oven, sprinkle the Buffalo Chicken Dip with finely chopped green onions. Serve it warm with dippers like tortilla chips, celery sticks, or cracker selections. Enjoy every savory, spicy, creamy bite! Buffalo Chicken Dip with Franks Buffalo Sauce isn’t just a dip; it’s a celebration in a dish. Each mouthful will joyfully remind you of spicy wings without the mess—perfect for cozy nights in or spirited gatherings with friends. So, grab your ingredients, gather your people, and get ready to dip into something truly delightful! Perfecting Buffalo Chicken Dip with Franks Buffalo Sauce Cooking Process To achieve the best results, start by cooking your chicken and then shredding it. While the chicken cools, mix cream cheese and sour cream. Combine everything in a baking dish and then top with cheese before baking. Add Your Touch to Buffalo Chicken Dip with Franks Buffalo Sauce Feel free to customize this dish by adding ingredients like diced bell peppers for a crunch or switching out the cheddar cheese for a creamier gouda. Experiment with spices like garlic powder or smoked paprika for an extra kick. Storing & Reheating Buffalo Chicken Dip with Franks Buffalo Sauce Store any leftovers in an airtight container in the fridge for up to three days. To reheat, simply pop it in the oven until bubbly, or use the microwave for a quicker option, just be sure to cover it. Sharing this dip at parties always leads to laughter and rave reviews; my friend once dubbed it “unicorn food” because it’s that good! FAQs About Buffalo Chicken Dip with Franks Buffalo Sauce What is Buffalo Chicken Dip with Franks Buffalo Sauce? Buffalo Chicken Dip with Franks Buffalo Sauce is a creamy, spicy appetizer that combines shredded chicken, cream cheese, sour cream, and the iconic Frank’s RedHot Sauce. This mouthwatering dip offers a perfect balance of heat and richness, making it a favorite at parties and gatherings. It’s easy to prepare and can be enjoyed with tortilla chips, crackers, or veggies. The dip is not only delicious but also versatile, as you can customize it with various ingredients to suit your taste. How do I store Buffalo Chicken Dip with Franks Buffalo Sauce? To store Buffalo Chicken Dip with Franks Buffalo Sauce, place any leftovers in an airtight container and refrigerate. It can be safely stored for up to three days. When you want to enjoy it again, simply reheat the dip. You can use the oven for an even warmth or the microwave for a quicker option. Just remember to cover it when reheating to maintain moisture and flavor. Can I make Buffalo Chicken Dip with Franks Buffalo Sauce in advance? Absolutely! You can prepare Buffalo Chicken Dip with Franks Buffalo Sauce ahead of time. Just follow the recipe and assemble the dip in the baking dish. Cover it tightly with plastic wrap or aluminum foil and store it in the fridge for up to 24 hours before baking. When you’re ready, simply remove it from the refrigerator and bake according to the recipe instructions. This